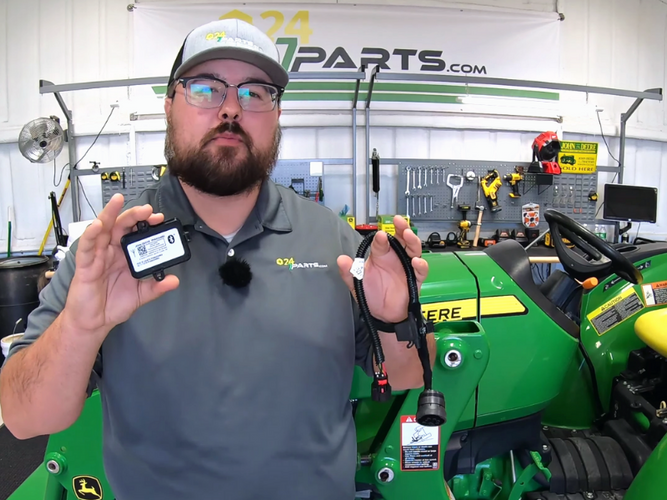
Stay on top of your tractor’s maintenance needs with this state-of-the-art attachment.
---


Ever hit with seemingly sudden breakdowns and maintenance disasters on your machines? It can be difficult to anticipate the needs for something that can’t talk back. But what if it could?
Here we’ll tell you about a quick and easy attachment installation that will easily fix those communication issues.
In this kit:
- Zip-ties
- Wiring harness
- TractorPlus Smart Connector


The TractorPlus Smart Connector allows for information and data to be sent from the Service Advisor port on your machine to the TractorPlus app on your smartphone in real-time via Bluetooth. This will allow you to know diagnostic information, important codes, etc. as well as giving you access to the parts diagram.
For the purposes of this blog, Brent is shown working on a John Deere 3043d, but this specific connector is compatible with 2, 3, and 4-series tractors as well as some 1 and 5-series tractors.
Installation
The Connector needs to be installed onto different locations depending on your machine. On other machines, you’ll find your Service Advisor Port located underneath the cowling on the right side in front of the steering wheel, as shown. That said, on John Deere 3d-series tractors like the 3043D shown here, the Port is covered by a cap and found near the floor of the machine just below the seat.


Before you can attach the Connector to the Port, you will first need to attach it to the wiring harness included in the kit, like shown. Once attached, press down on the red clip until it clicks to secure the connection.


Next, you will need to unscrew the cap on the Service Advisor Port and plug the other end of the wiring harness into the now exposed Port. Notice there are nine total prongs located at the end of the harness, but only four are functional. Line these functional prongs up with the holes on the Port to successfully connect the two. Once connected, turn the plug clockwise to lock it into place and finish the installation.


Now that the Connector is installed, you will notice that both it and the harness are somewhat hanging loosely in the way to be stepped on and potentially kicked while the tractor is in use. On machines where the Port is located under the front cowling, you would be able to tuck the harness away easily out of sight. In order to tuck the harness away on 3d-series tractors, you have the option to either secure it to the tractor frame using zip-ties or drill holes into the side of the machine near the seat and secure things using screws and the eyelets found on the Connector, shown here.

---
And that’s it! You’ve now successfully installed a TractorPlus Smart Connector onto your John Deere tractor. If you have questions about any of the steps outlined above, or are just more of a visual learner, head over and subscribe to our YouTube channel to watch our step-by-step video (also attached below)! Be sure to leave a comment with your questions to receive a personal reply from Brent himself, our resident YouTube John Deere expert.
Follow along on Instagram (https://www.instagram.com/westernequipment) too!

