

A How-To & Review of the John Deere Riding Mower Covers
By: Katie McKinley
Shop this item here: Part No. LP93917
Protect your mower and prevent premature wear-and-tear with the John Deere Riding Mower Cover.
---
In this article we will be referring to covers made for the John Deere 100-300 Series Riding Mowers. In addition to these covers, we also recommend the John Deere Mower Seat Covers which come in a variety of sizes and will help keep your machine looking like new.
Keep reading to learn about John Deere Riding Mower Covers.
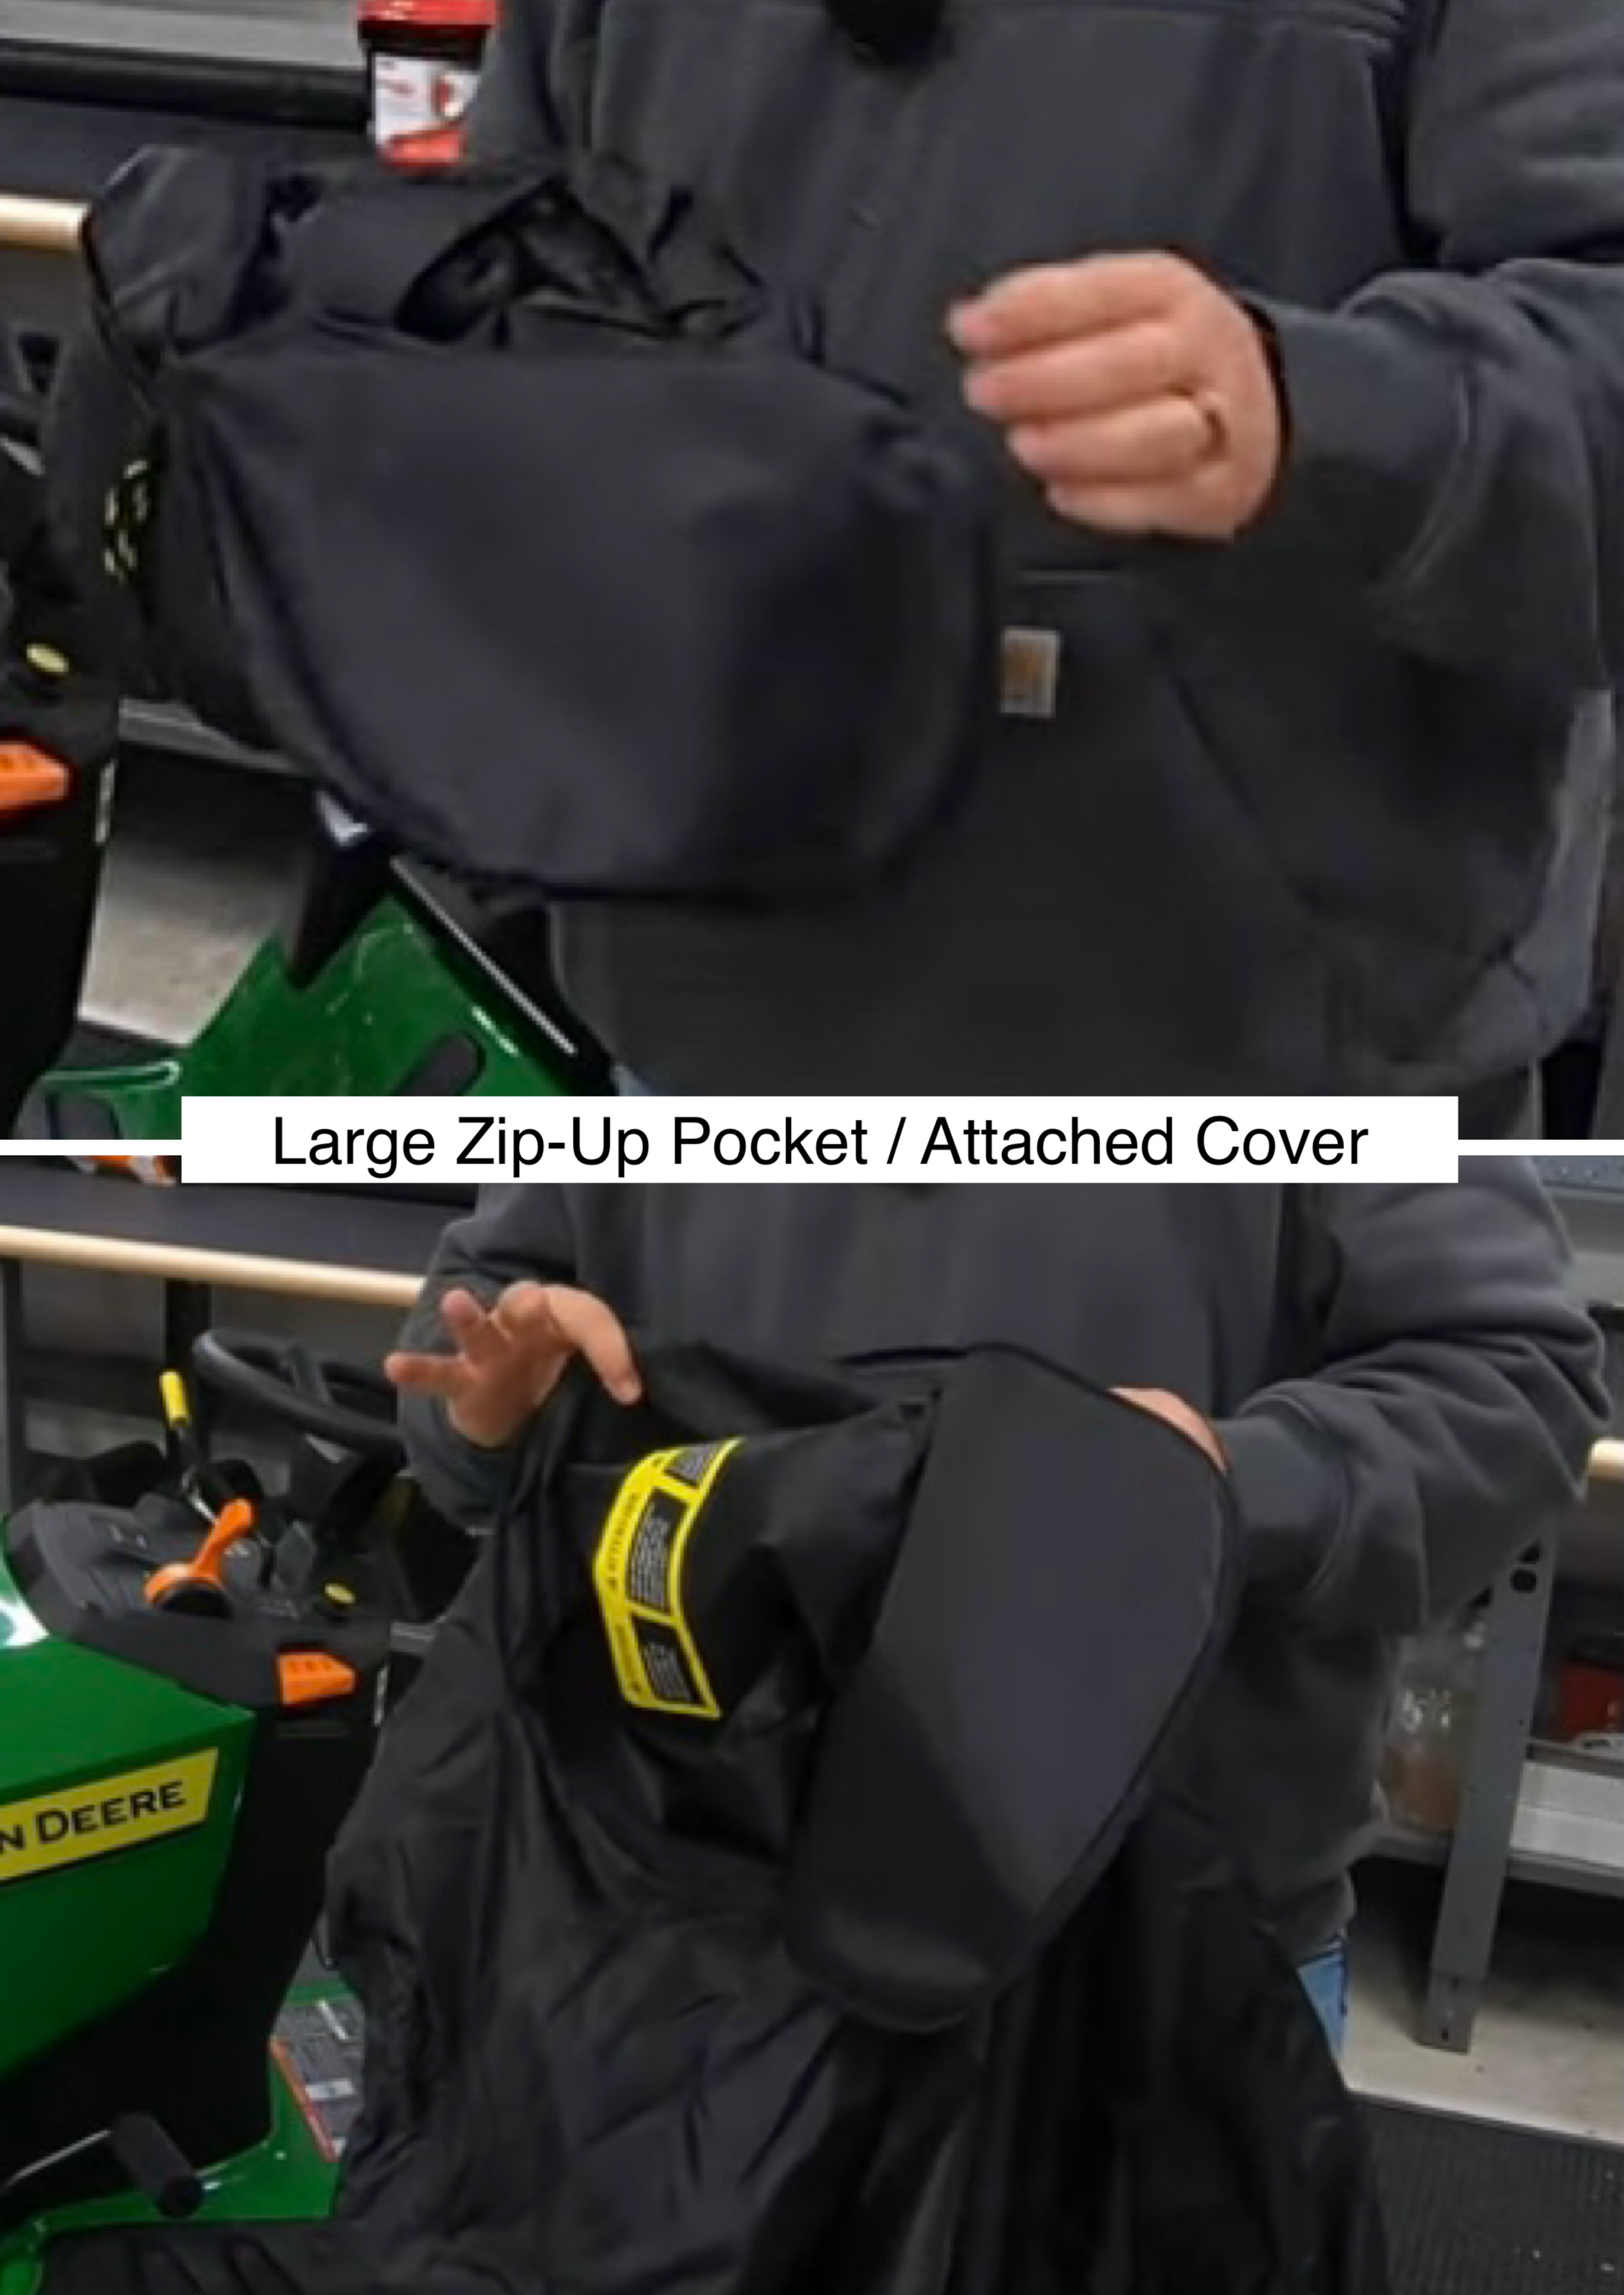
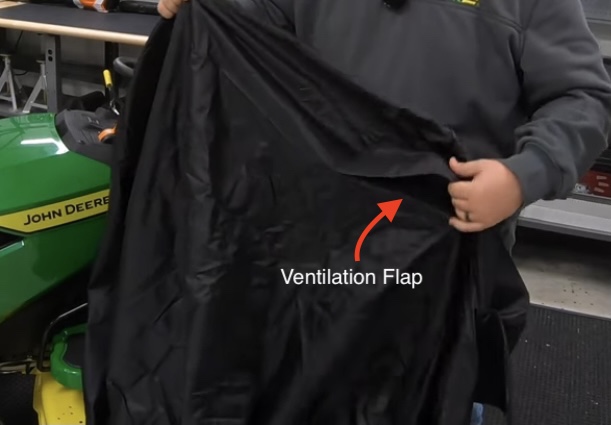
Featured on this cover:
- Prominent John Deere logo on front
- Large zip-up pocket for easy, all-in-one storage
- Ventilation flaps
- Durable, weather-proof material
- Elastic band for secure grip to mower


Why it’s essential
Installing a John Deere Riding Mower Cover will help protect your mower from harsh elements like rain, wind, insects and animals, and various other things that could potentially cause unnecessary wear-and-tear to your machine.
As you can see here, the attachment provides full coverage when installed on this mower. And the weather-resistant material is also waterproof. Precipitation will simply bead up and run off the cover without ever soaking into the fabric or reaching the mower. In the GIF below, Brent is shown demonstrating the waterproof material by pouring water on the cover.

These are a must-have if your mower sits outside for any extended amount of time, even if it’s under an awning or shaded area. But a cover can also be beneficial if your mower is stored indoors in your garage, shed, or barn. You won’t regret adding this to your attachment collection.
How to install the cover
When you take the cover out of the box, you’ll notice it seems to be stored in a case. This case is actually a pocket sewn into the rear of the cover. Unzip the pocket to reveal the folded cover, then remove it and zip the pocket back up. To prepare for install, shake and smooth the cover out and locate the front end—the pocket will always be at the rear of the mower when installed. For a visual of what the pocket looks like, refer to the images above.
Now, starting at the front of the mower towards the bottom, slip the front end of the cover up and over the hood and along the length of the machine, being sure to pull down the sides as you go. Then pull the cover down the back end all the way to the ground allowing the elastic band to grip snuggly to the underside of the tire.
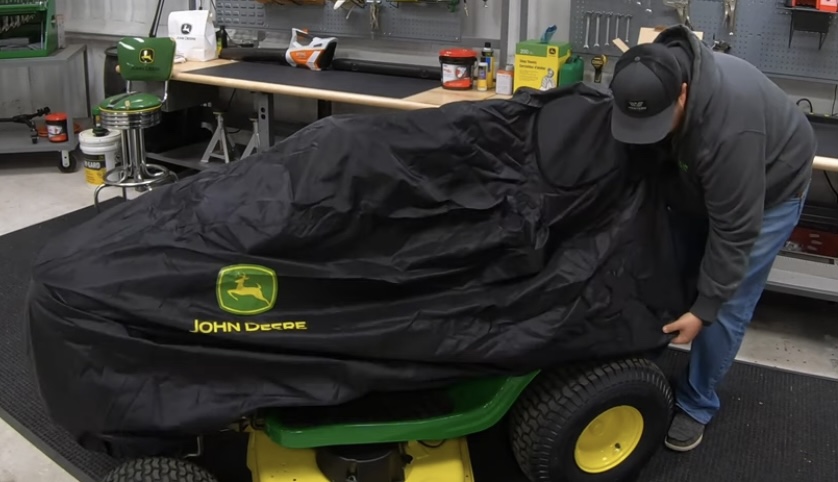

Once you’re done, smooth out the material while checking to ensure all areas of the mower are covered. That should complete the installation of your John Deere Riding Mower Cover!
---
If you have questions about any of the steps outlined above, or are just more of a visual learner, head over and subscribe to our YouTube channel to watch our step-by-step video (also attached below)! Be sure to leave a comment with your questions to receive a personal reply from Brent himself, our resident YouTube John Deere expert.
Follow along on Instagram too!