

How to Install a Throttle Cable on a John Deere Riding Lawn Mower
By: Katie McKinley
Keep your mower accelerating like new with this quick-and-easy throttle cable install.
---
After having your mower for a while, you may notice your throttle cable giving out or that it became damaged somehow. This can be due to wear and tear from extensive use over time or due to environmental reasons and how it was stored.
You can easily fix this issue by swapping the old throttle cable on your machine for a new one, and we’ll show you how. Keep reading to learn how you can install a new throttle cable onto your John Deere Riding Mower.
What you’ll need:
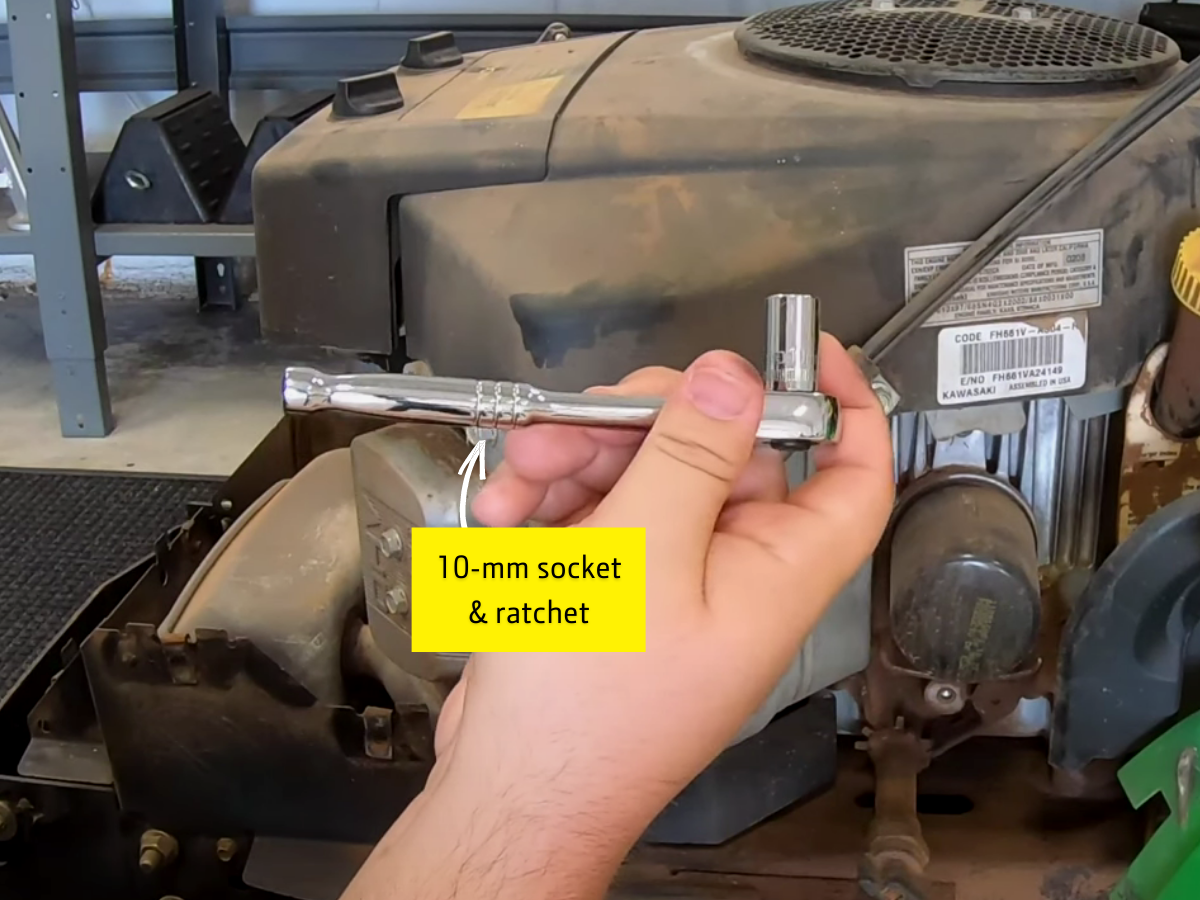
- Ratchet
- 10-mm socket
- 5/16-inch socket
- Phillips head screwdriver
- New throttle cable assembly
Preparing for installation
Removing hood and mounting clamps
Before beginning the installation process, you will first need to remove the hood of your mower as well as the shroud cover bolted onto the frame piece shown here. Removing these will allow for easier access to linkage points where the throttle cable connects to the engine.
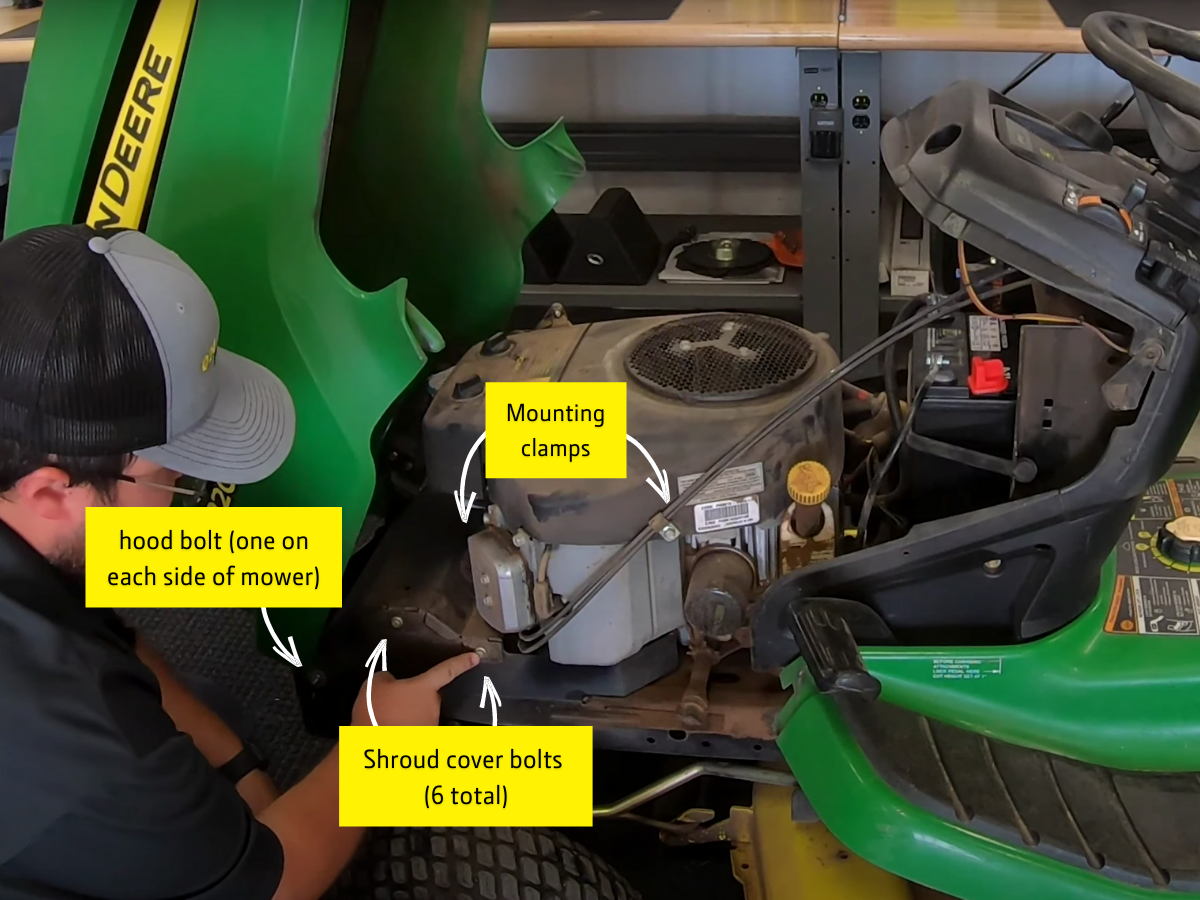
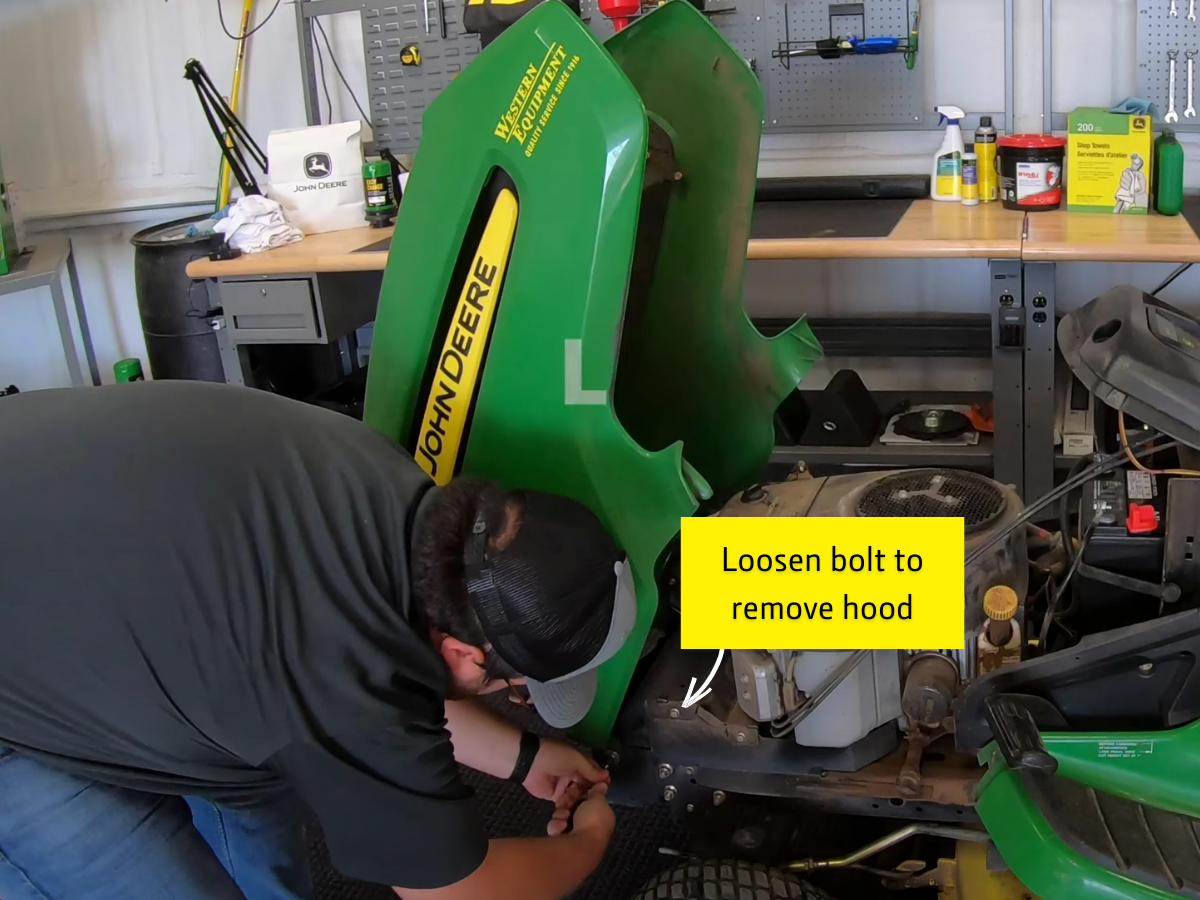
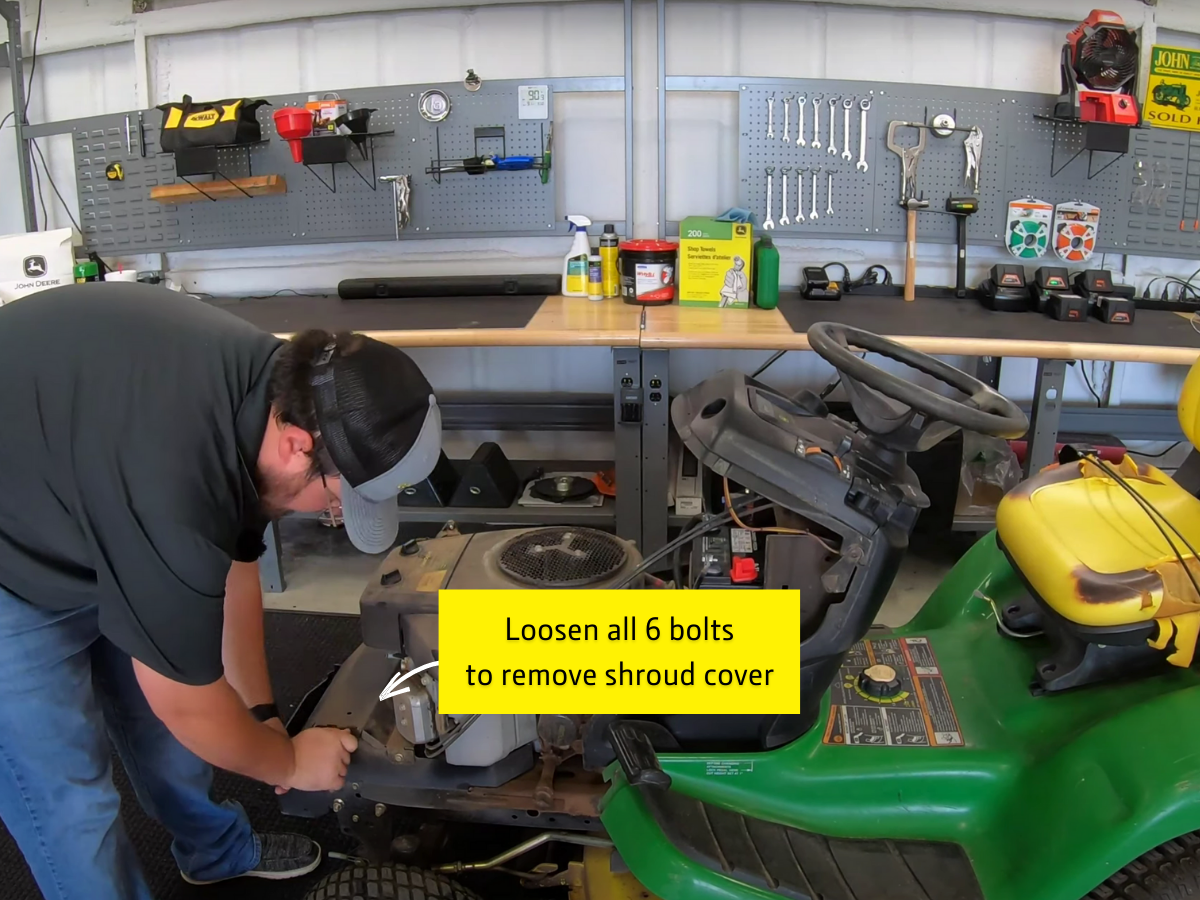
To remove the hood, loosen on bolt on each side using a 10-mm socket and ratchet, then remove the lights. Once done, hold the hood securely on each side and pull back to pop it off the frame. Now remove six bolts from the front frame piece in order to remove the shroud cover—two bolts on the right side, two on the left, and two on the front. After these bolts are removed, lift the shroud cover and set aside.
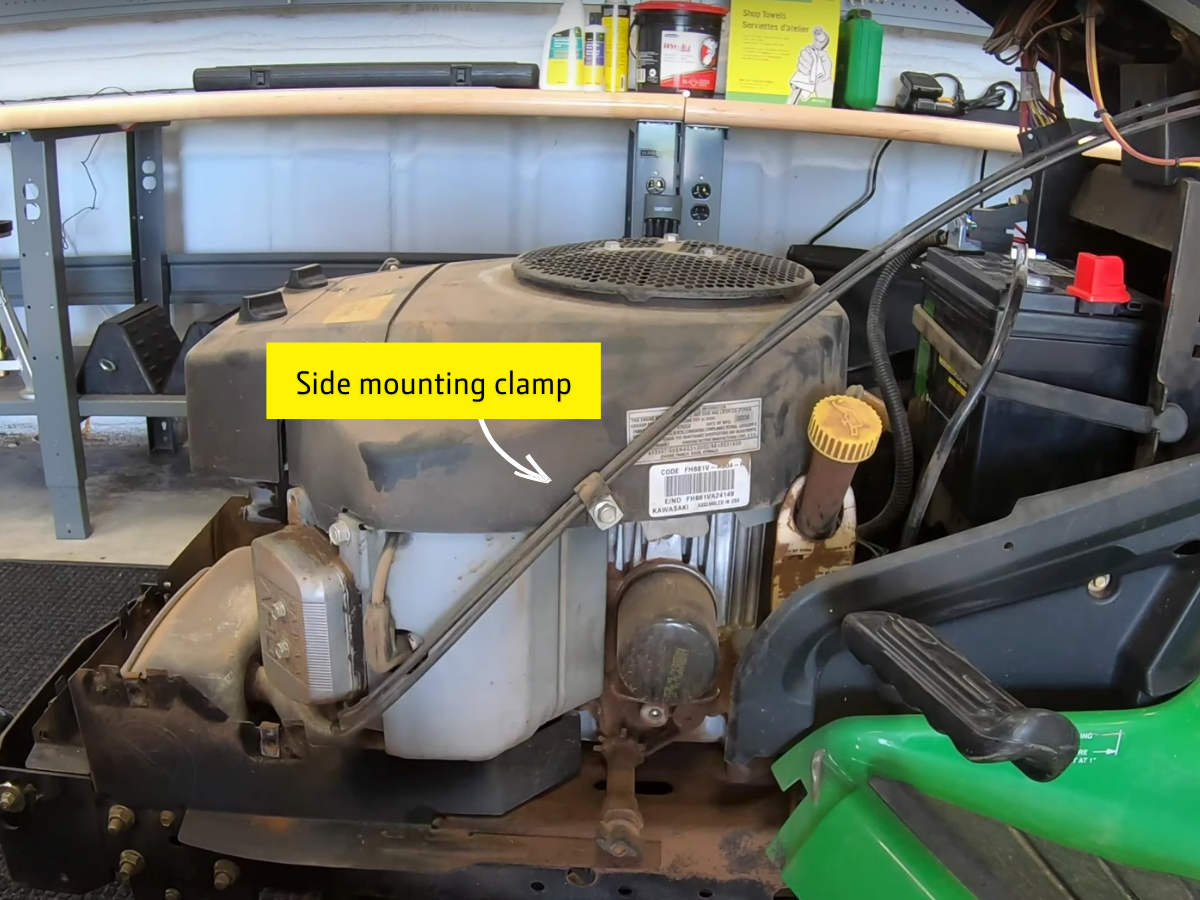
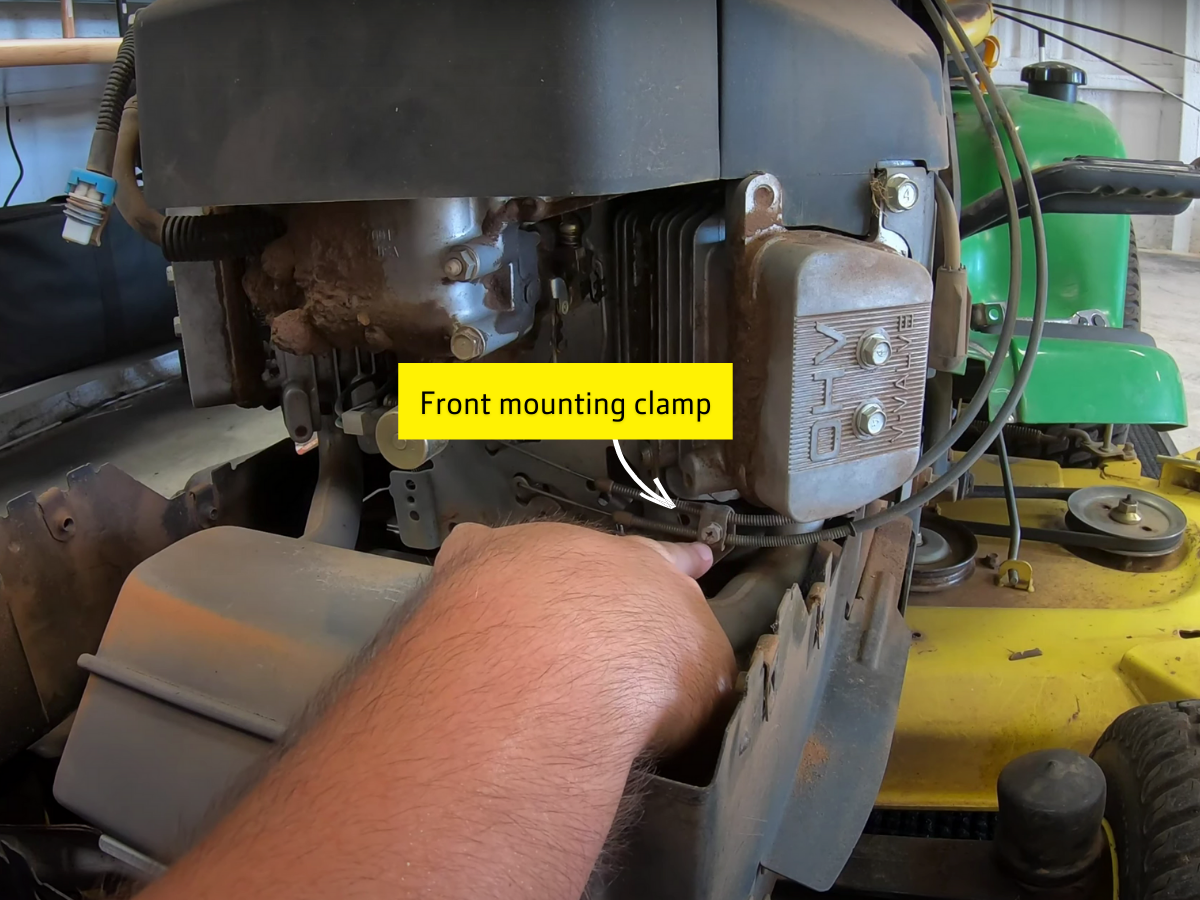
Next, using your socket wrench, remove the bolt securing the mounting clamp found on the side of the engine that is holding the throttle cable wires in place. Then using a Phillips head screwdriver, loosen the screw securing the mounting clamp found on the front of the engine as well, like shown (Tip: If the screw is stripped out, like the one shown here, use a 5/16-inch socket and ratchet to unscrew). Once both clamps are released, you can detach the cables from the front of your mower frame.
Removing throttle cable assembly
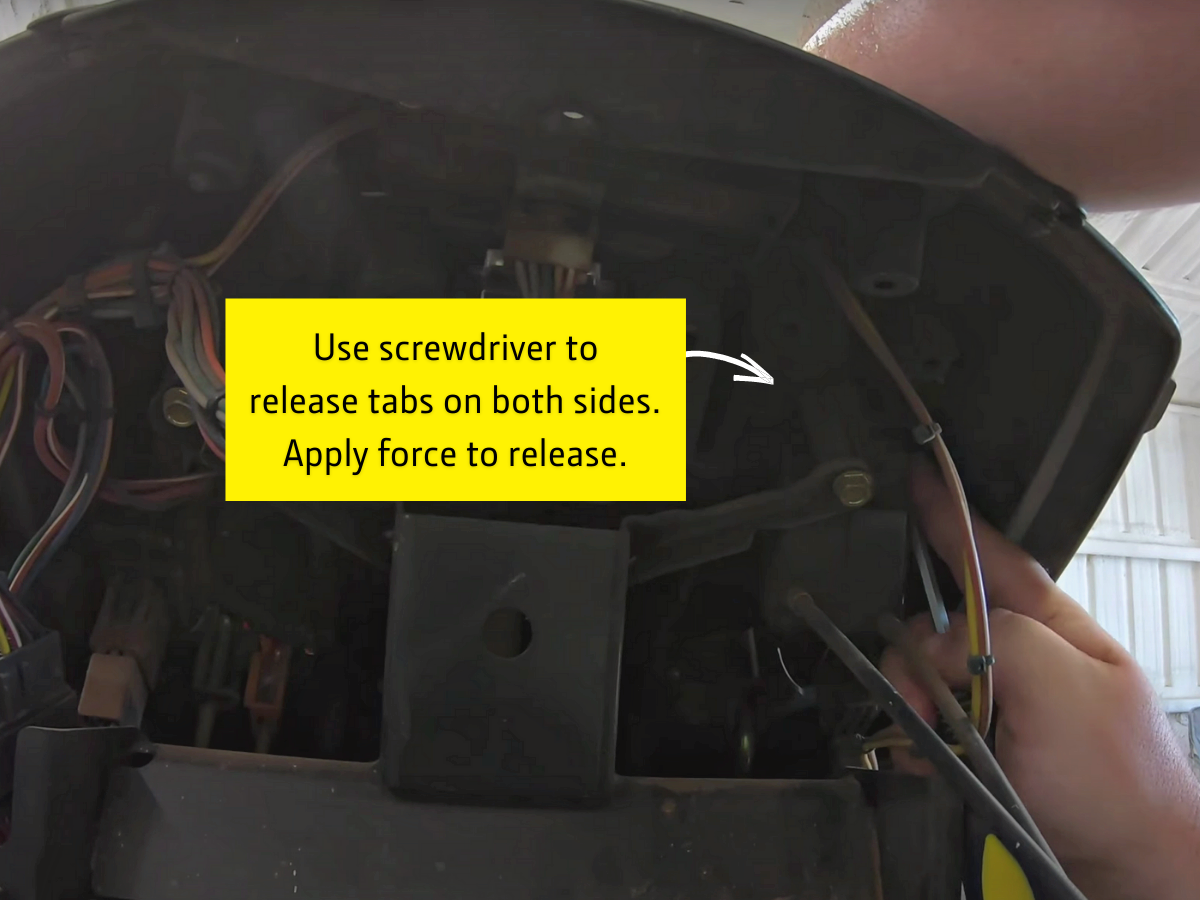
Using a screwdriver for better contact, reach under the dash of the mower and press to release the tabs on the old assembly that are holding it into place. Be sure to push in and out on both sides, and keep in mind that you may need to apply some force to release the tabs.
Once the tabs are released, simply lift the old assembly up and out of the dashboard by holding the throttle lever at the top and pull the cables through, like shown. You can now dispose of the old and start the installation process with the new throttle cable assembly.
Installation
First steps
To install your new throttle cable assembly, start by threading the cables through the hole that was left when we removed the old one. Thread them through until the throttle control panel at the top is set into place on the mower dashboard. Once in place, push the orange lever—the throttle—all the way back. You can now begin connecting the cables starting at the front of the mower.

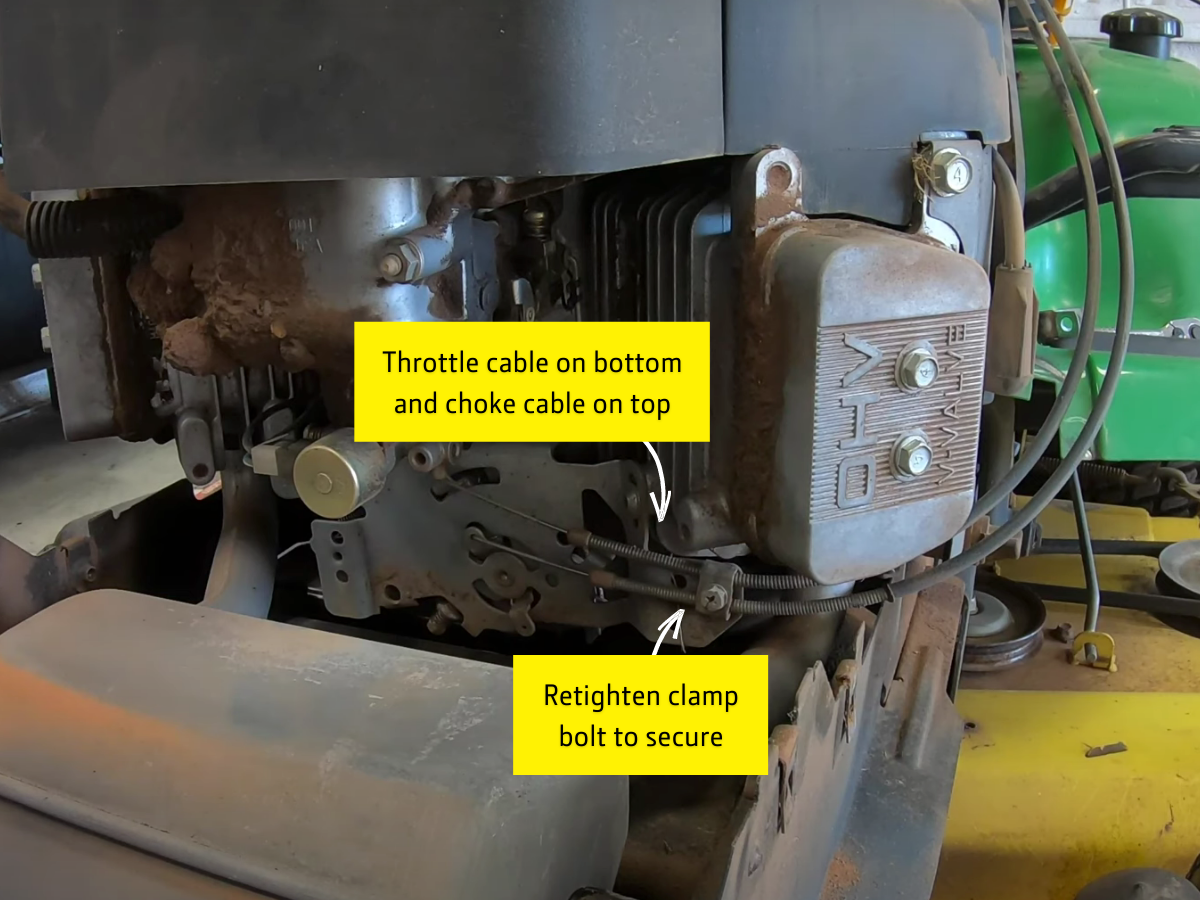
Thread the two cables under the valve cover and secure them to the frame using the mounting clamp at the front of the engine. Remember that your choke cable is on top and the throttle cable is on bottom, and refrain from retightening the screw quite yet as you may need to make adjustments before installation is complete.
Now thread the choke cable into the top hole and the throttle cable into the bottom, like shown. Now you can re-tighten the screw to secure the cables using a screwdriver or the 5/16-inch socket and ratchet.
Testing the connection
When the assembly and cables are properly installed, the throttle and choke levers will have full range of motion when moved up and down. You can see this also by looking under the dash and watching the cables move as you move the levers.
Final steps
If everything is installed correctly and the levers are working as they should, you can move onto the last steps in the process.
First, fix the cables to the side of your engine using the mounting clamp you loosened earlier. To do this, simple thread the cables through the clamp and re-tighten the bolt to secure. Next, reattach the shroud cover on the front and secure once again by using the six bolts you removed earlier. And finally, place your hood back on the frame and secure using two bolts on each side.
---
And that’s it! You’ve now successfully installed a throttle cable onto your John Deere Riding Mower!
If you have questions about any of the steps outlined above, or are just more of a visual learner, head over and subscribe to our YouTube channel to watch our step-by-step video (also attached below)! Be sure to leave a comment with your questions to receive a personal reply from Brent himself, our resident YouTube John Deere expert.
Follow along on Instagram too!