

How to Install a John Deere Z545R Home Maintenance Kit
By: Katie McKinley
It’s important to care for your equipment properly, and here at 247Parts.com, we’ve got just the tools for the job! Treat your John Deere mowers like family with our Home Maintenance Kits.
Today, we will specifically be telling you about the John Deere Z545R Home Maintenance Kit. Keep reading to learn more on what comes with the kit and how to use it.
---
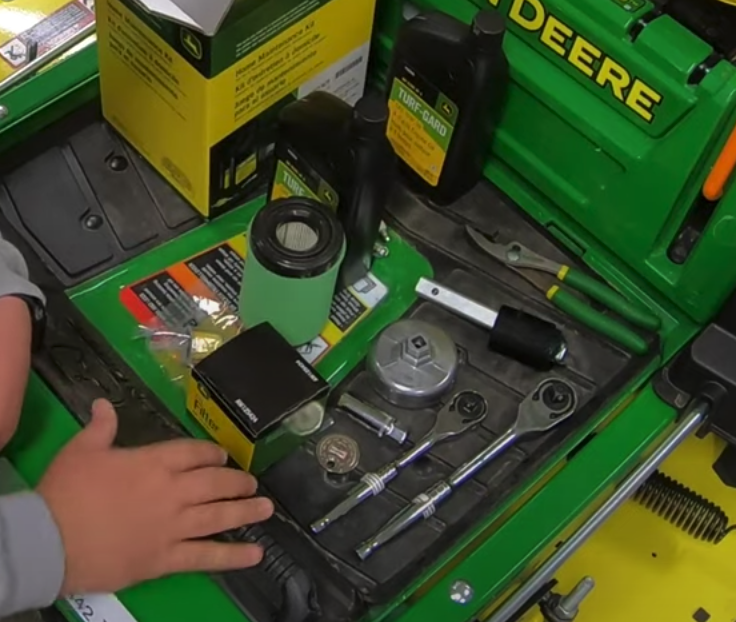
What you will find inside this kit:
- 2 quarts oil
- 3 filters – air filter, fuel filter, and oil filter
- 2 spark plugs
What you will need:
- Pliers
- Oil filter wrench
- 3/8 or 1/2-inch ratchet (dependent on socket and filter wrench used)
- Funnel
- Drain pan
- Spark plug gap gauge
- 5/8-inch spark plug socket
Kit Installation
For a more detailed overview of the steps outlined in this blog, check out our video below!
Changing your oil filter
Drain the mower oil before replacing the filter, but make sure to warm the oil first so it drains easier. To do this, simply start the mower and allow it to run for a few minutes before shutting off the engine.
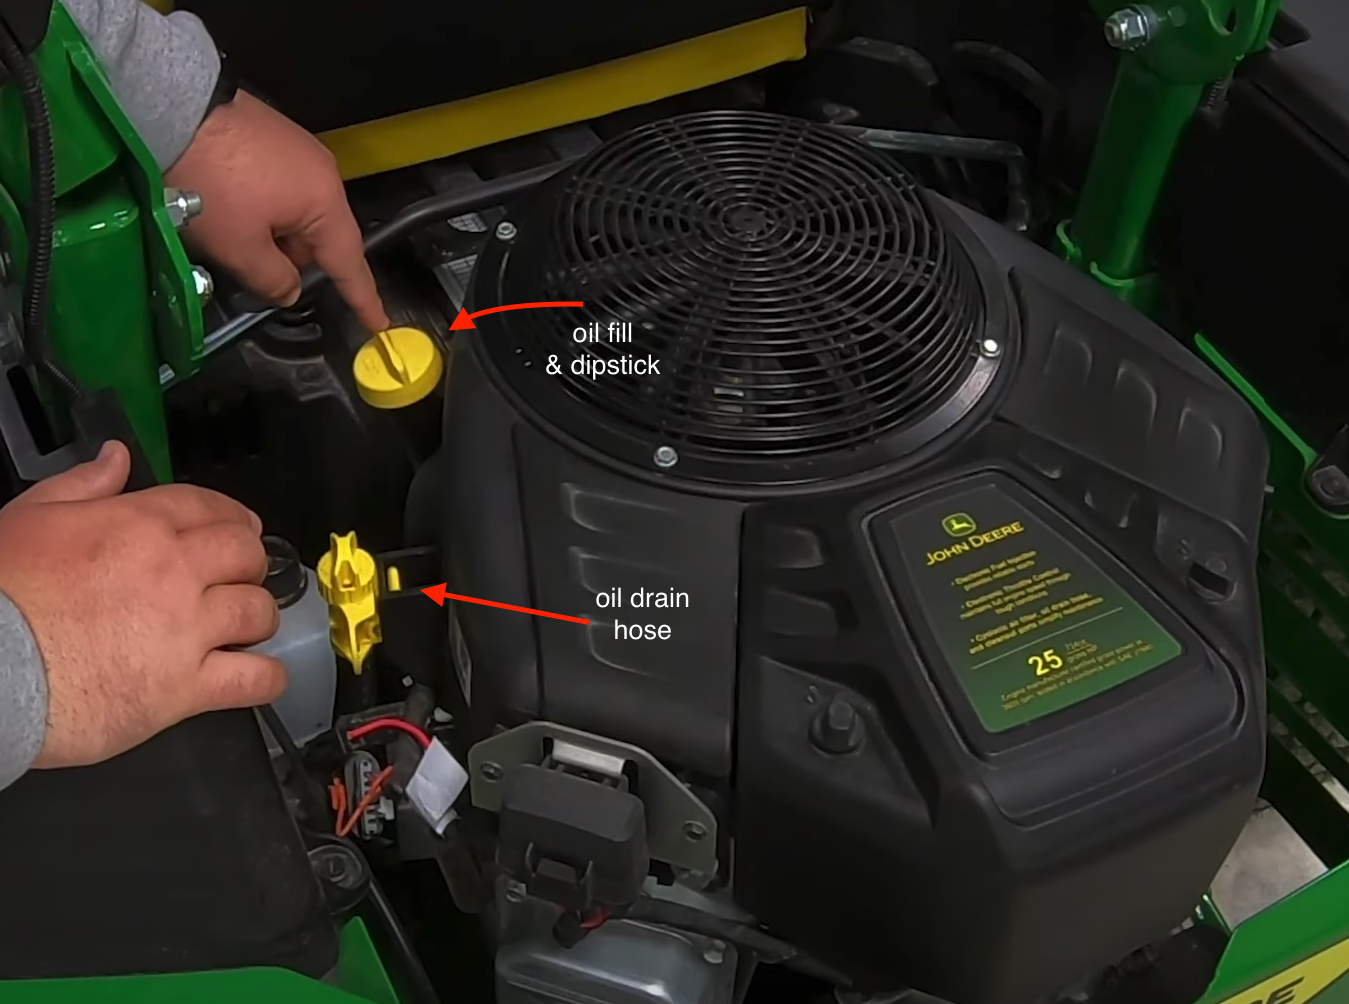
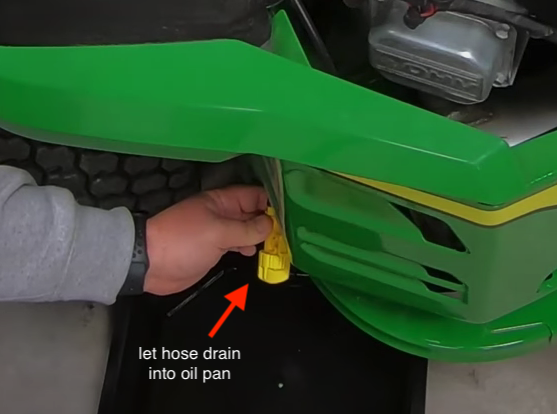
Detach and push the oil drain hose down and out of the mower frame avoiding injury by keeping a safe distance between yourself and the muffler. Once the hose is exposed near the side of the engine, place the oil pan underneath and open the hose cap to allow the oil to drain—to speed up drainage, open the fill cap as well. You may move onto the task items below while waiting for drainage to complete.
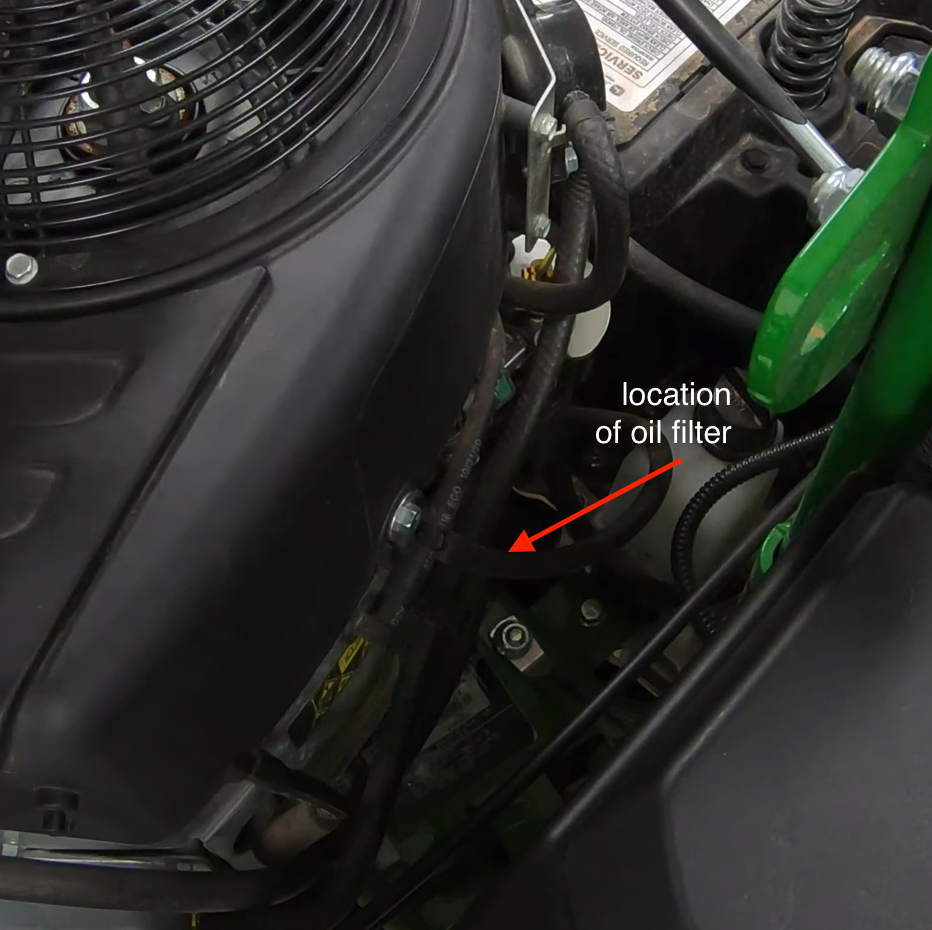
Once drained, we can change the oil filter located under the front of the mower engine on the right-hand side. Loosen the filter by first fitting the oil filter wrench on and then attaching the ratchet. Now remove the filter by hand, allow it to drain into the oil pan, then set aside. Make sure to move the oil pan underneath the right-hand side of the mower engine prior to removing filter to allow for mess-free drainage.
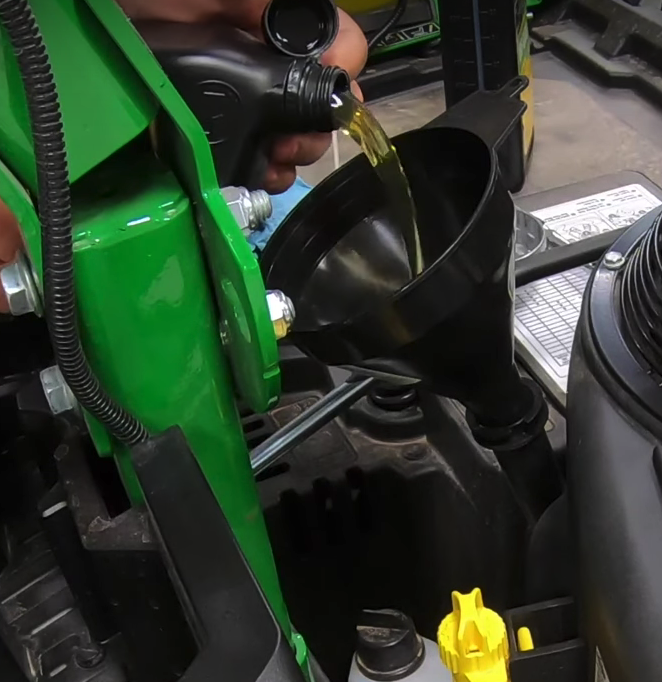
To prepare the new filter, apply a thin layer of fresh oil to the gasket to ensure a better seal. Install the filter by hand until it’s snuggly fastened against the engine and tighten with the oil filter wrench and ratchet being careful not to over-tighten. Now replace the cap and put the hose back in place, as shown above. Next, remove the engine oil fill cap and dipstick. Pour in the two quarts of oil found in your kit using the funnel then replace the dipstick and cap—tighten to secure.

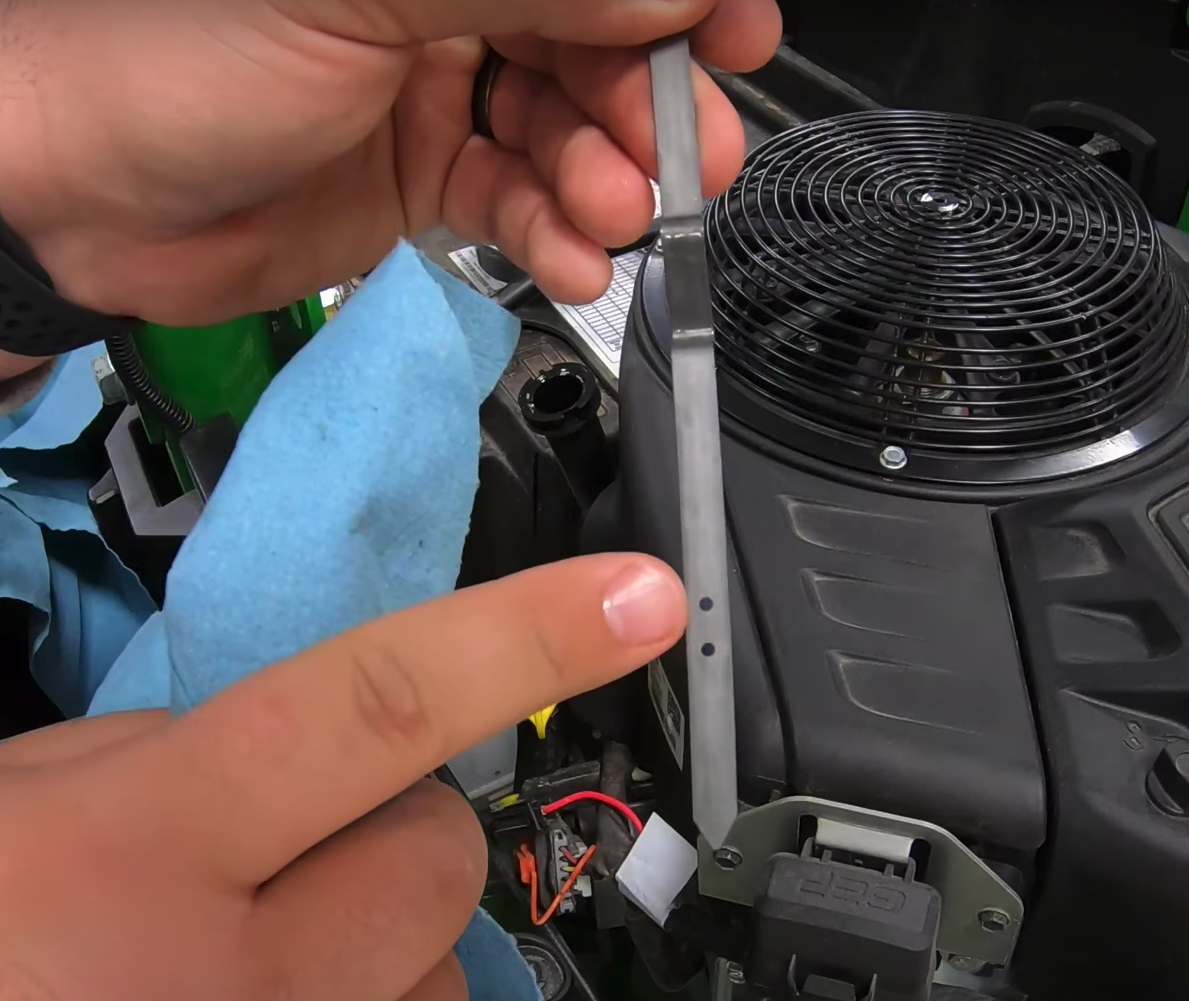
With install complete, check for possible leaks by again starting your mower to warm the oil. After a few minutes, shut off the engine and allow it to cool, then check the oil level by removing the dipstick. The oil level should be between the two dots on the dipstick shown here.
Changing your air filter
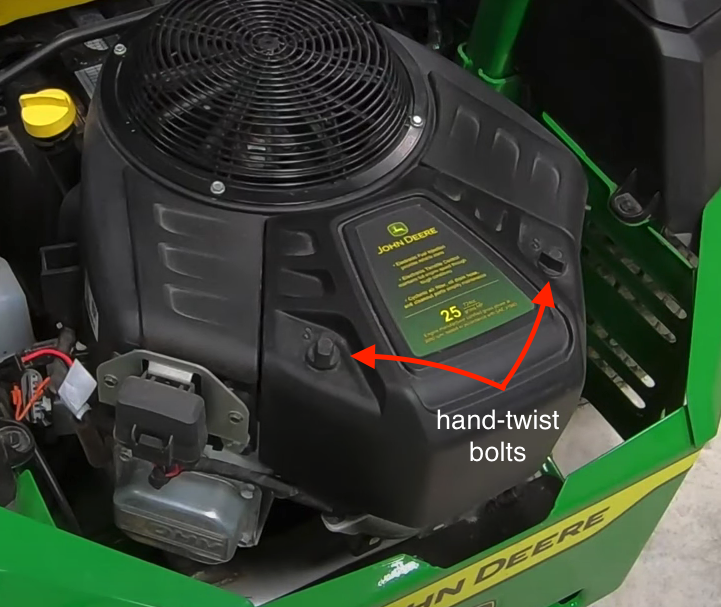
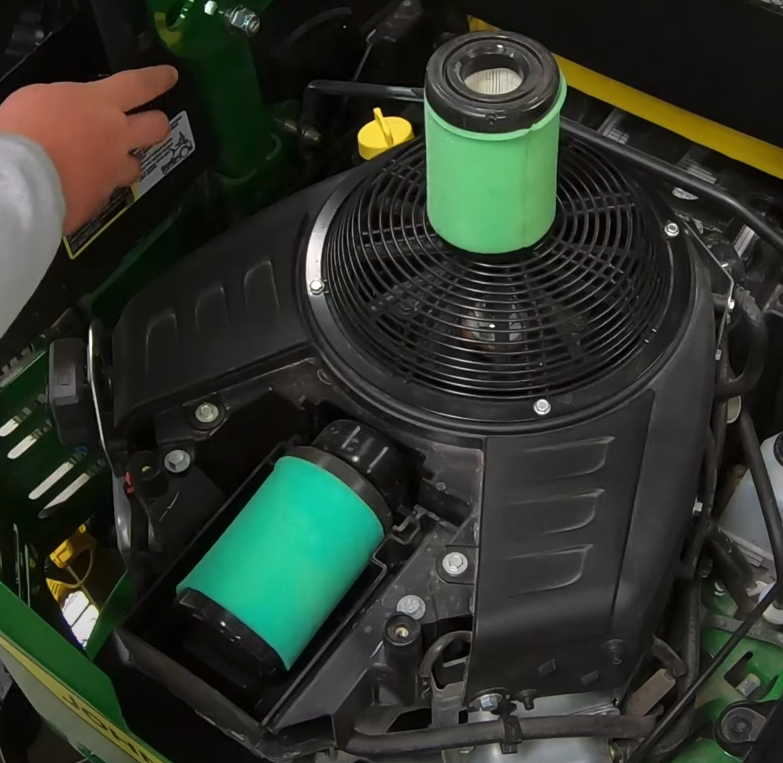
To change the air filter on your mower, loosen the two hand-twist bolts shown here and lift to remove the housing cover. Remove the old filter and simply insert the new one in its place. Replace the housing cover and tighten the bolts to secure.
You have now successfully installed your new air filter.
Changing your spark plugs
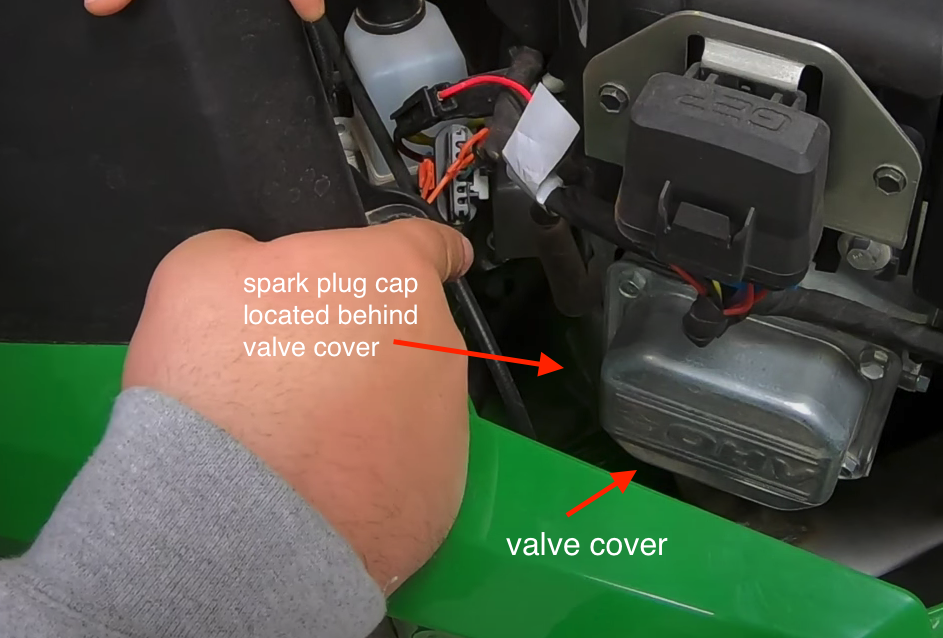
On the V-Twin engine shown here, there is a spark plug on both sides that will need changing. On each side, reach below and behind the valve cover to access and remove the spark plug cap. Now take the ratchet and spark plug socket and loosen the old plug until it can be removed by hand.
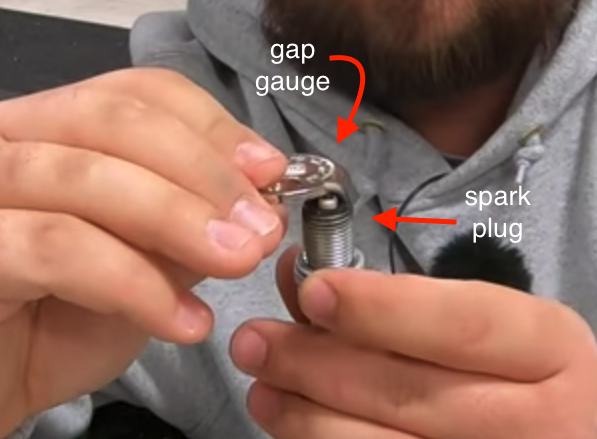
Prior to installing your new spark plug, use a gap gauge to ensure it is gapped correctly. Using the gauge measurements as a guide, insert the smallest side between the top electrode and the middle pin on the plug, as shown. Run the plug along the edge of the gauge until you feel resistance indicating the gap measurement. For the Z545R mower shown here, the gap should measure 0.030 inches. Most plugs included in a John Deere HMK will be gapped correctly, but it is always best to ensure proper gapping before installation.
You can now twist on the new plug by hand following with the socket and ratchet to secure.
Changing your fuel filter
Be prepared for possible mess when changing your fuel filter. Using pliers, grab hold of the two clips located at the top and bottom of the filter shown here. Move each clip away from the filter on the hoses, paying close attention to the side of the filter to which each hose is attached. The red clip at the bottom marks where the fuel goes into the filter from the tank. You will see an arrow on your filters indicating the direction of flow to help with proper install.
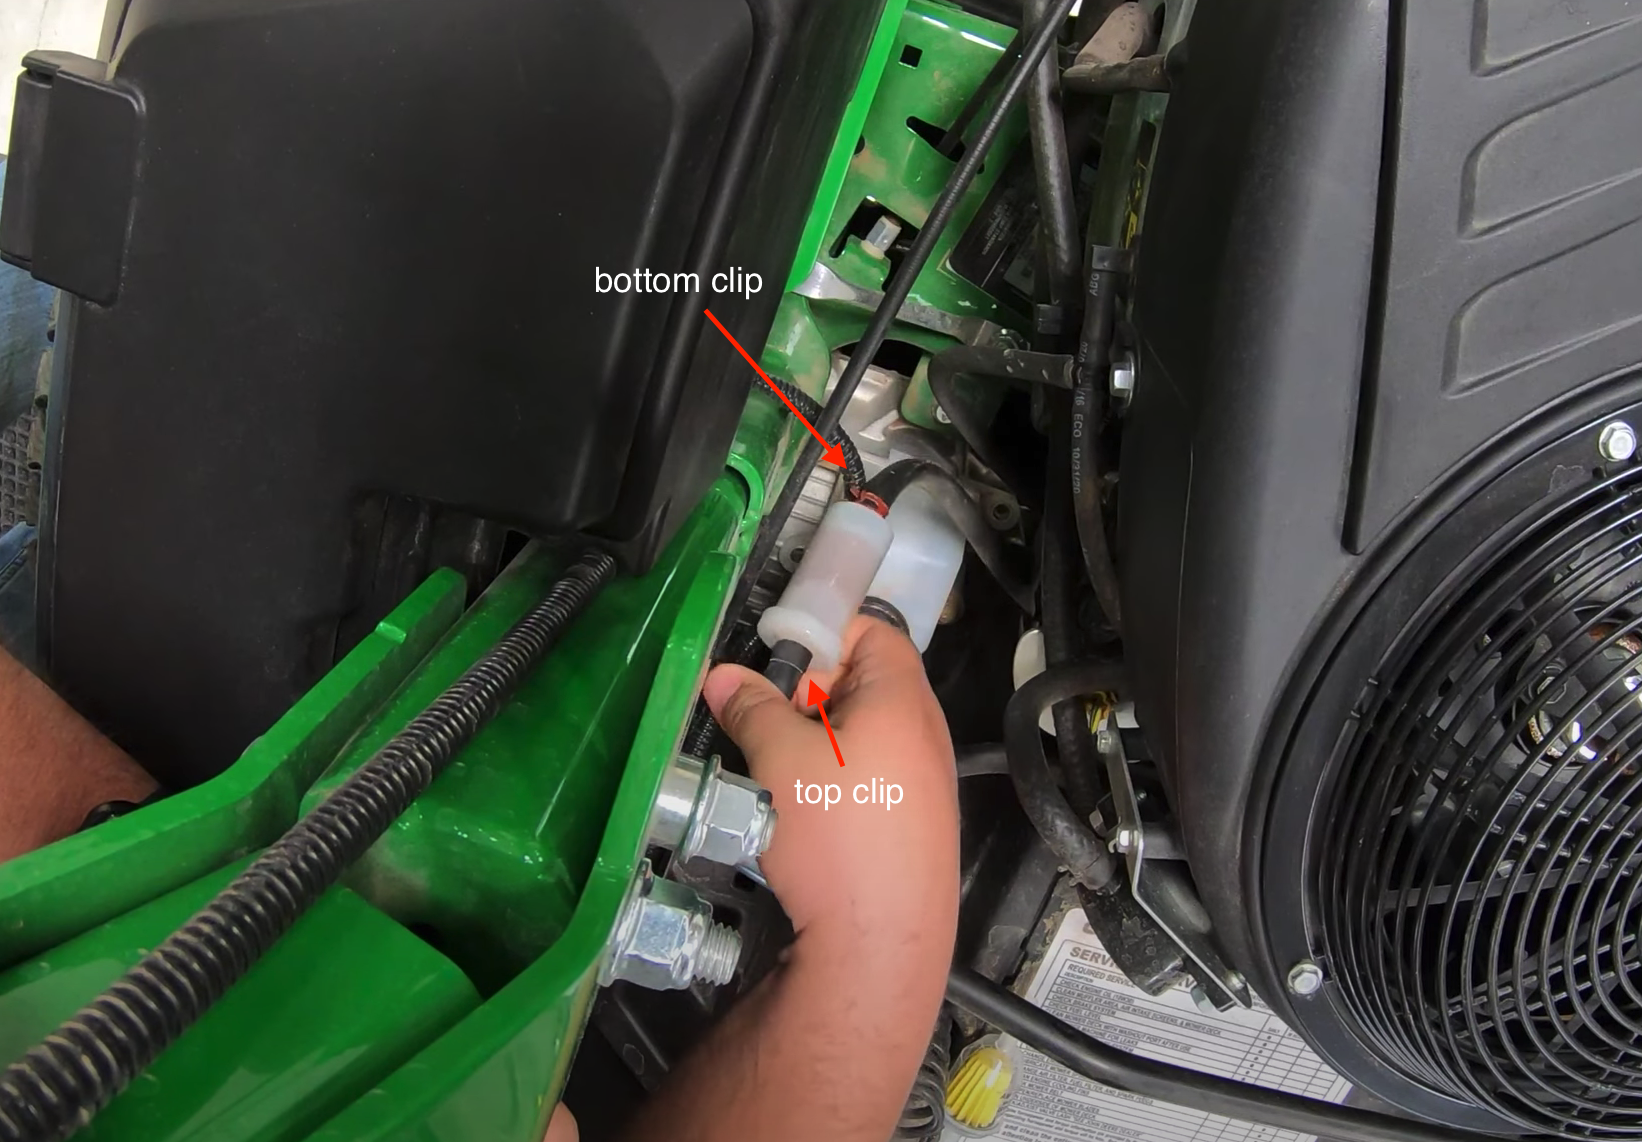
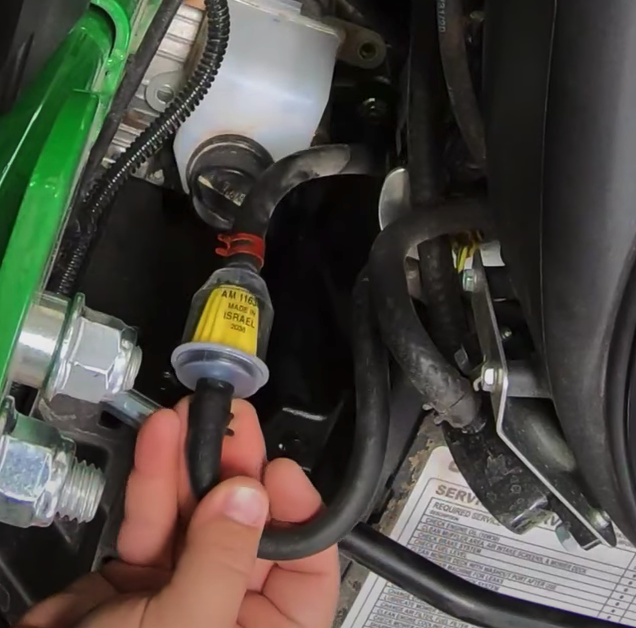
After moving the clips, remove the hoses from the old filter and reattach to the new one while again paying attention to the directional flow arrows mentioned above. Reinstall the clips to complete install, with the red clip on bottom and black on top like shown here.
And that’s it! We hope you enjoyed this step-by-step guide on how to install the John Deere HMK on a Z545R mower. And again, for a more detailed overview of the steps mentioned in this blog, check out our video below.
Interested in purchasing one of our John Deere Home Maintenance Kits? Grab yours here.
---
Like what you see here? Be sure to sign up for our email list to be notified when we post! Subscribe below.
Are you more a visual learner? Find more of our John Deere how-to’s on our 247Parts YouTube channel as well! Watch the video below and subscribe. Be sure to follow us on Instagram as well.