

How to Install a John Deere Mower Bumper Guard for Lawn Tractors
By: Katie McKinley
Save your mower from unnecessary damage while driving and keep it looking brand new with this newly updated attachment.
---
When operating any machine, you may experience accidents from time to time. Whether you are mowing your lawn, loading onto a trailer for transport, or allowing your child to drive for the first time, things can happen that may cause damage to your equipment. This attachment will act as a barrier and help protect and save the front of your mower. That, and it looks pretty great too!
This John Deere Front Bumper Guard is designed for S100, E100, D100, and S200 John Deere Lawn Tractors. Its single-bar design is new to 2021, replacing the older two-bar design. For the purposes of this article and the video linked below, Brent will be shown working with a 100-Series mower.
Keep reading to learn more about how to install this useful attachment.

In this kit:
- Bumper guard
- Keeper pins
- Washers
- Mounting pins
- Instruction manual

Preparing for Install
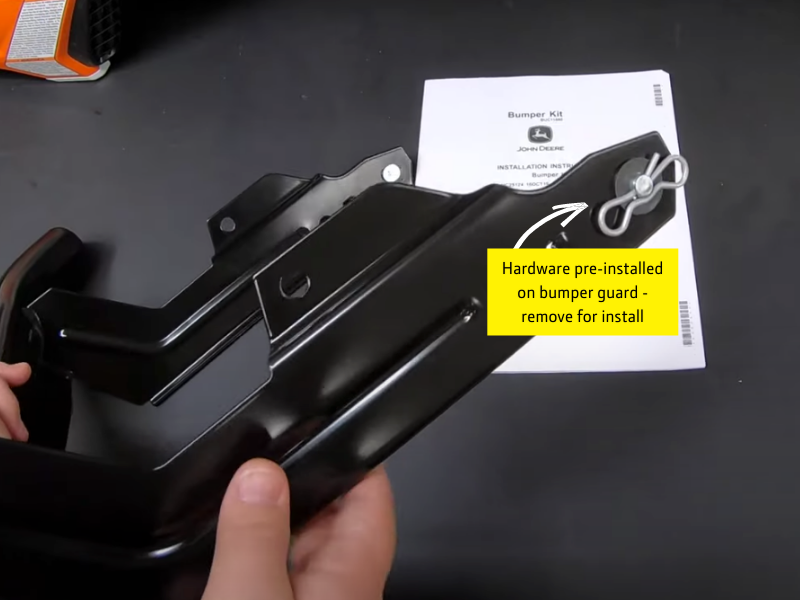
When removing the bumper guard from the package, note that all hardware (keeper pin, mounting pin, and washer) are already installed onto the bumper. This is just to keep it all contained inside the box. To prepare your bumper guard for install, you will need to remove this hardware from both sides, which will allow you to mount it into place on the mower. Then you will secure everything with the hardware.
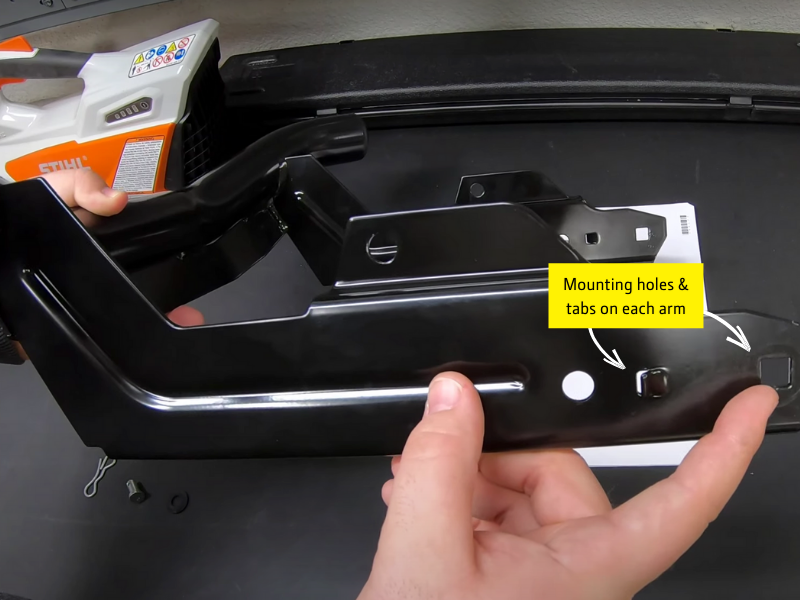
Also notice there are mounting holes and tabs at the end of each arm of the bumper guard. These will match up with the holes on the mower frame and allow you to reinsert the pins through both, locking the bumper guard in place.
Installation
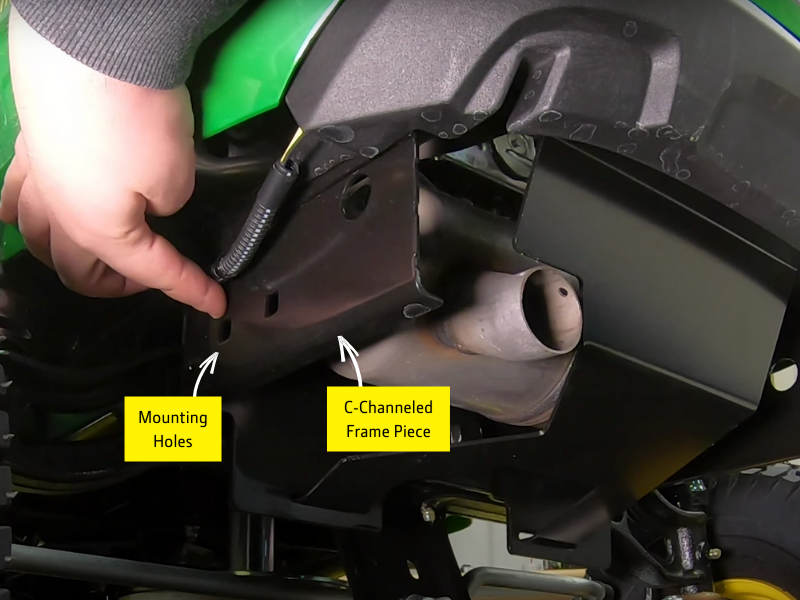
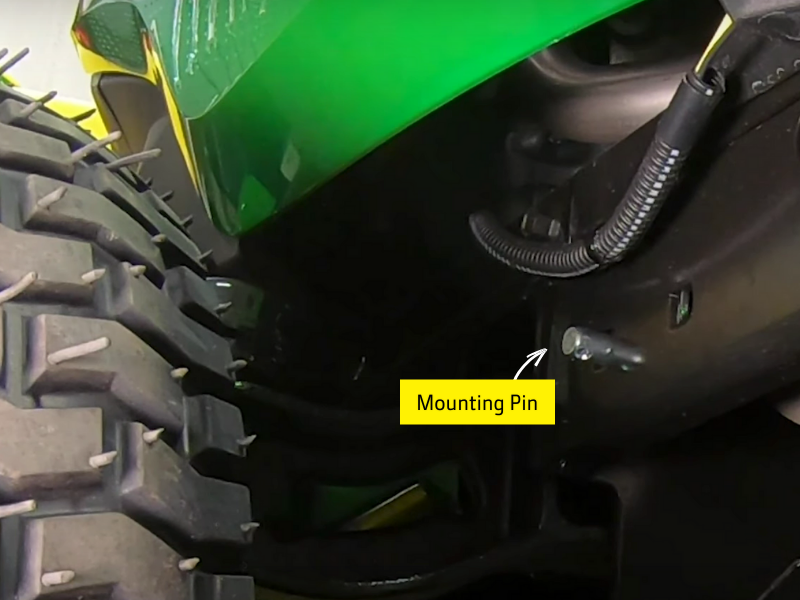
On the underside of your mower, locate the two frame pieces on either side of the front end, like shown. Each frame piece will be c-channeled and feature two holes to be used for mounting the bumper (Note: c-channeled refers to the shape of the frame piece).
To install, slide the arms of the bumper guard into the frames ensuring the attachment is facing up and the holes and tabs line up, like shown. You will notice the arms of the bumper guard are slightly wider set than the frames. Because of this, you will need to apply somewhat forceful pressure to push one of the arms inwards so it will then slide inside the frame piece.
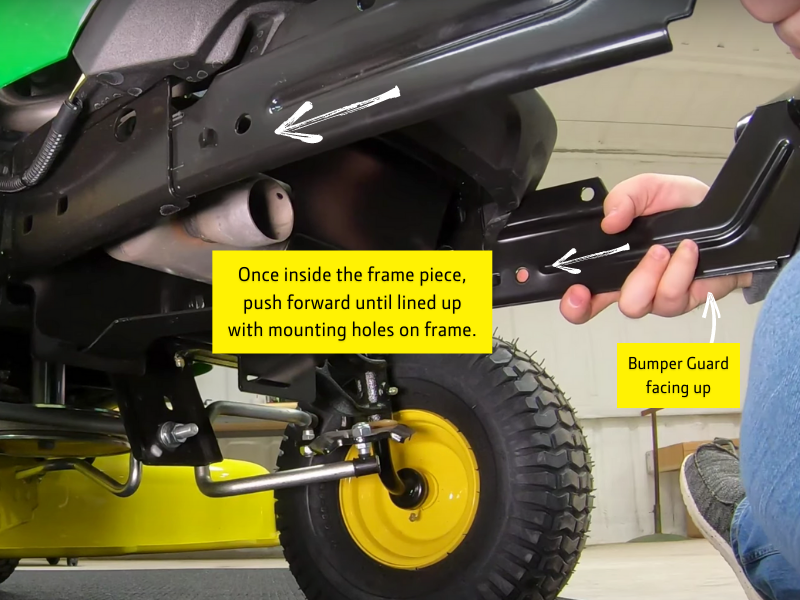
While doing this, you should feel the tabs on the bumper guard lock into their designated slots letting you know everything is in place. Now, starting on the left frame side, insert your mounting pins through the hole going from the inside of the frame piece until you see it exposed on the other side, like shown. Secure the mounting pin with your washer and keeper pin. Be sure to turn the mounting pin so the holes are facing left and right before placing the washer and inserting the keeper pin.
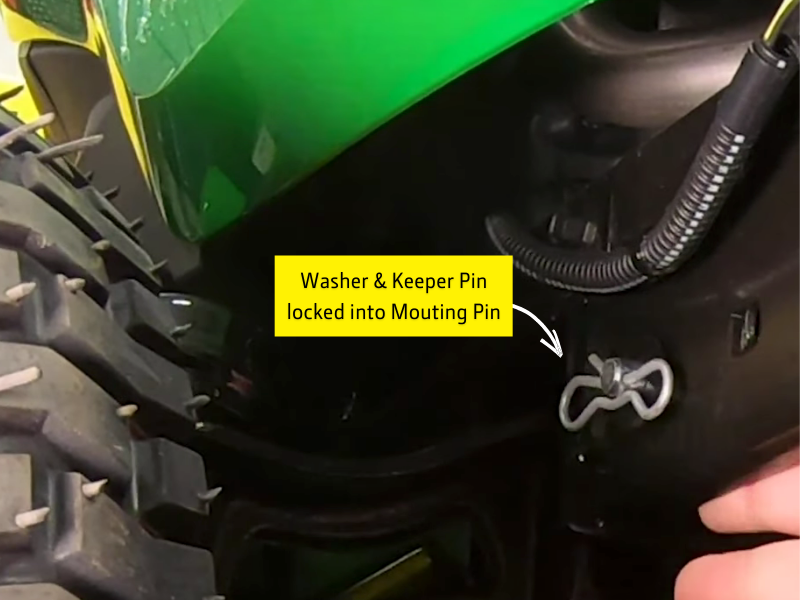
Follow the same process with the remaining hardware on the right frame piece and arm to complete the installation process.
---
And that’s it! You’ve now successfully installed a John Deere Front Bumper Guard onto your lawn tractor!
If you have questions about any of the steps outlined above, or are just more of a visual learner, head over and subscribe to our YouTube channel to watch our step-by-step video (also attached below)! Be sure to leave a comment with your questions to receive a personal reply from Brent himself, our resident YouTube John Deere expert. And be sure to sign up for our email list below to receive updates on all our Learning Center content!
Follow along on Instagram too!