

How to Install a Horn on a John Deere TX 4x2 Gator
By: Katie McKinley
Shop by Part Number: BM23193
Make yourself heard with this easy-to-install gator attachment.
---
If you find yourself driving your John Deere Gator in places such as your workplace, the pasture, or even on a baseball or any other athletic field, you NEED this attachment.
With a quick and easy install, the addition of a horn to your John Deere Gator will make navigating crowds of both people and animals safer and easier. Safety is important when driving any machine, no matter where you are or what you’re doing.
Keep reading to learn more about this horn attachment and the installation process.
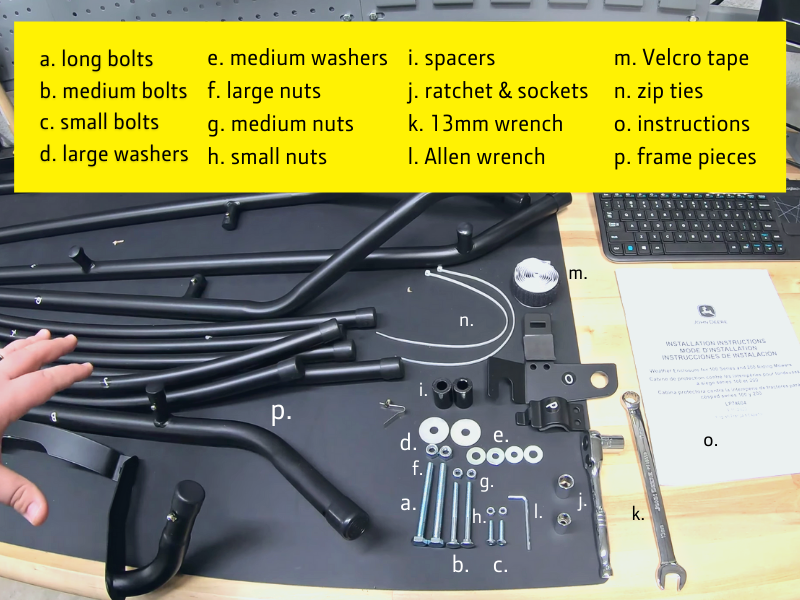
In this kit:
- Zip-ties
- Horn
- Wiring harness
- Switch & jam nut
- Nuts and bolts
- Cap nut / horn button
- Instruction manual
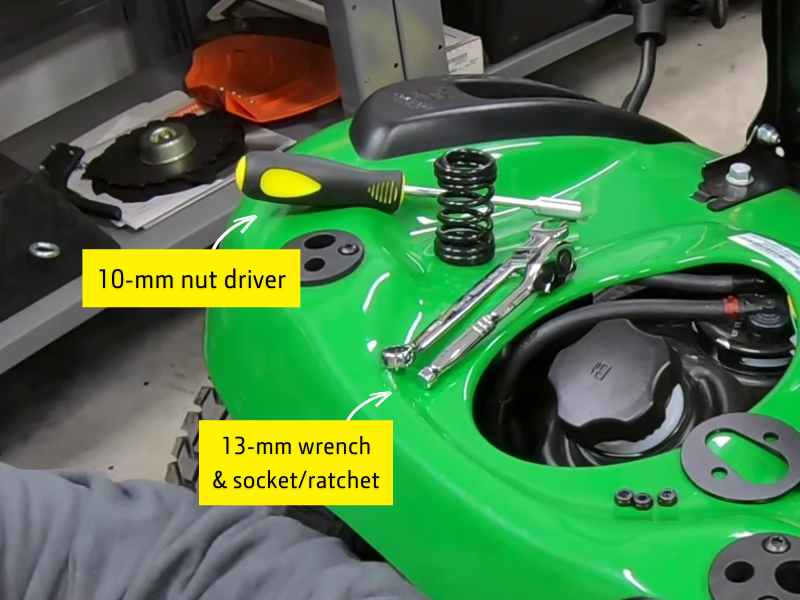
Required tools:
- Electric drill or impact driver
- Half-inch hole drill attachment
- Can substitute with razor knife, if needed.
- 13-mm wrench and socket

Installation
For a more detailed overview of the steps outlined in this blog, check out our video below!
Removing the hood of your Gator
Before beginning installation, you will first need to remove the hood from your Gator. This will expose the wiring underneath and allow for easy-access to the back of the dashboard, both of which will be necessary for install.
To remove the hood, start by locating the small, green triangles just under the headlights on each side of your gator. These point to two tabs on the underside of the hood that latch onto the frame and hold it in place. Release these tabs to easily pop off the hood.
Installing the button & switch
To install the horn activation button and switch, you will need to drill a hole just to the left of the light switch on the dash of your Gator. You should see a somewhat recessed hole here, which is where you will begin drilling. Once drilled, the horn switch will be placed through this hole. (Note: The light switch should already be installed on your machine, but if for some reason it was not, drill the hole to the right of the display panel. Both points are shown here.)
Prior to placing the switch through the hole, screw the jam nut all the way onto its shaft and ensure the hole in the dash was cut large enough for a proper fit. If the hole is too small, simply widen it a little more using the drill. Once the nut is in place, reach behind the dash and insert the switch into the hole so the switch end is exposed on the top of the dash, like shown. Once in place, tighten the jam nut for a more secure hold.
You can now screw on the cap nut, or horn activation button, over the switch until it is flush against the dash.
Installing the horn
If you read the instruction manual, you will find it provides a couple of different options for installing the horn onto your machine. Both options assume your machine has either a blade attachment already installed or that its frame features threaded holes. On the John Deere TX 4x2 Gator Brent is shown working on here, neither of those things are true. Consequentially, a work-around was necessary for this install. We’ll explain how to do this below.


Located on one of the middle frame pieces, like shown, Brent found a hole where the horn can be securely mounted. Start by inserting a bolt into the bracket on the horn and then threading through the hole on the frame. Using your 13-mm wrench and nut, tighten the bolt until secure. If your Gator has threaded holes or the blade attachment, know that you will still install the horn the same way using the tools mentioned at the start of this article. You may also follow along with the instruction manual, if necessary. (Tip: while a secure hold is important, be sure to leave the bolt slightly loose in order to allow for moving once it’s in place.)
Installing the wiring harness
To familiarize yourself with the wiring harness, take note of the different ends and where they go. The end with the two red wires will hook up to the horn switch on the underside of the dash, and the end with the red and black wires will hook up to the horn, like shown. The female plug, shown here, will plug into the male hookup located inside the frame at the front and to the left of the machine. (Note: it doesn’t matter which prong you hook the two red wires, as long as it is on the switch. The same is true for the black and red wires on the horn.)
Next, secure the wiring harness to the frame using the zip-ties included in your kit. This will prevent it from jostling under the hood and potentially causing any unnecessary damage or disconnections.
Once the harness is safely secured, replace the hood on the front of the Gator, securing the tabs at the front and covering the dash and exposed wires.
---
And that’s it! You’ve now successfully installed a horn onto your John Deere TX 4x2 Gator!
If you have questions about any of the steps outlined above, or are just more of a visual learner, head over and subscribe to our YouTube channel to watch our step-by-step video (also attached below)! Be sure to leave a comment with your questions to receive a personal reply from Brent himself, our resident YouTube John Deere expert. And be sure to sign up for our email list below to receive updates on all our Learning Center content!
Follow along on Instagram too!
Shop by Part Number: BM23193