

How to Install a John Deere 15-Gal Rear Mount Sprayer for Riding Mowers
By: Katie McKinley
Tackle those weeds with a John Deere 15-Gal Rear Mount Sprayer.
---
The John Deere 15-Gal Rear Mount Sprayer is meant for either a 100 or 200 Series mower and is equipped with a 2.2-gal per minute pump. It is also set up for a 12-volt system with an on/off switch which allows it to directly mount onto the battery.
For this article and the video below, we are mounting the sprayer on a 100 Series riding mower. Let’s get started!
In this kit, you’ll find:
- 15-gal tank
- Hand wand
- Two-nozzle boom option
- Two rear mounting brackets
- Two frame pieces
- Hardware (found inside tank)
- Switch harness
- Battery harness with fuse
- Mounting & framing hardware
- Operators’ manual


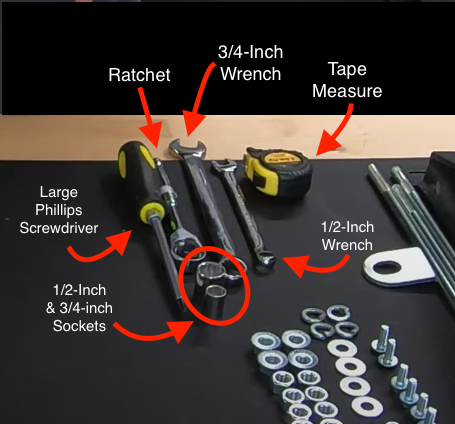
Tools needed for install:
- Tape measure - PT21243
- Half-inch wrench - TY19976
- ¾-inch wrench - TY19976
- Half-inch socket - TY19984
- ¾-inch socket
- Ratchet - PT20975
- Large Phillips screwdriver - TY26565
Frame Assembly
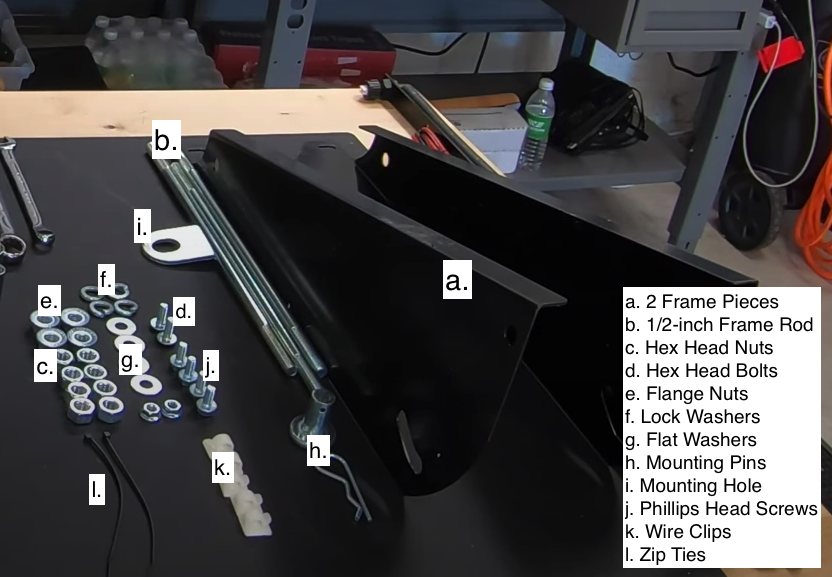
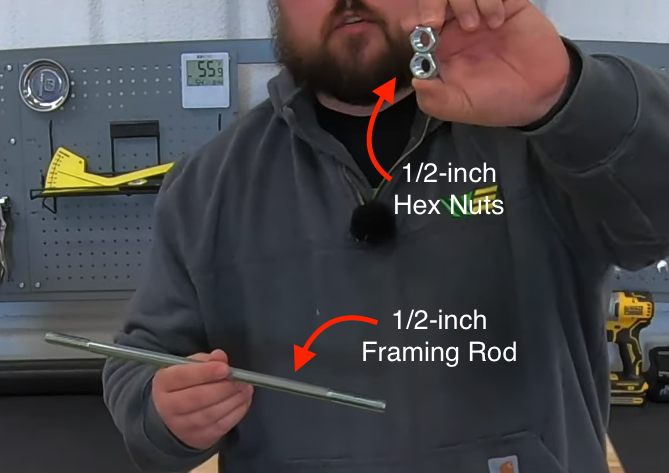
In order to properly mount the sprayer to your mower, you will first need to assemble the frame bracket. Make sure you have your two frame pieces, three rods, and six hex head nuts and lock washers on hand for this assembly.
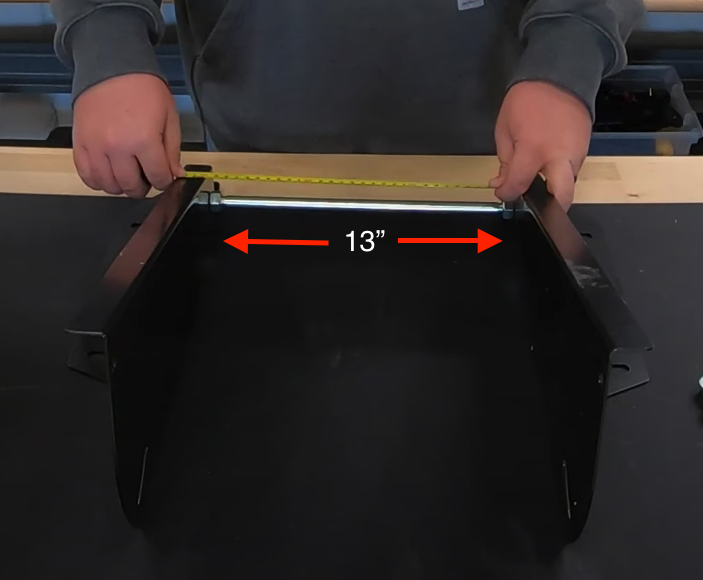
Set the two frame pieces side-by-side with the flat sides facing inward and the large “fins” at the base facing outwards. The large fins are where the frame will be mounted to the tank. Now screw a hex head nut onto each end of one of your regular frame rods and place the rod into the holes located towards the back of the frame, as shown. Measure the distance between the two frame pieces from face to face to ensure it’s approximately 13.5 inches. If your distance doesn’t quite meet that measurement, adjust the nut up or down the rod. Now place a lock washer and another hex head nut on both ends and tighten down using the half-inch wrench and ratchet.
Repeat these steps using the second regular frame rod, but instead of a hex head nut be sure to use a flange nut for a more secure hold. Place it into the slots on the bottom of each frame piece and slide it towards the front. This rod will serve as the top hanger and will bear most of the weight, which is why the stronger flange nut is needed. You may also slide the rod up or down the slot to achieve a higher mount. This will depend on the terrain you will be driving over when spraying, but it’s usually a safe bet to have it set towards the front of the slot.
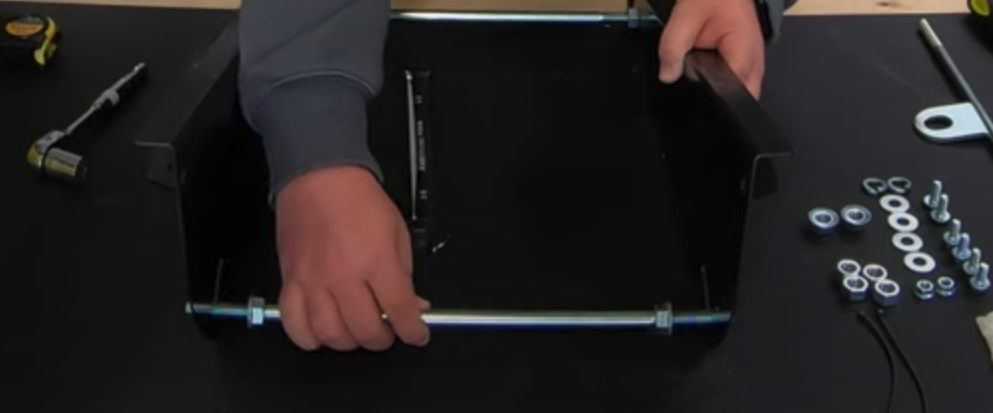
As you can see, the remaining frame rod is slightly different than the others. The hole will allow your hitch pin to connect to the mower later when mounting. This rod must be placed in the top holes of the frame pieces, like shown. Before placement, screw a hex head nut on each end, then place into the top holes ensuring the flat side of the hitch pin hole is facing up. Follow this with lock washers and hex head nuts on the ends and tighten using your ratchet and socket.
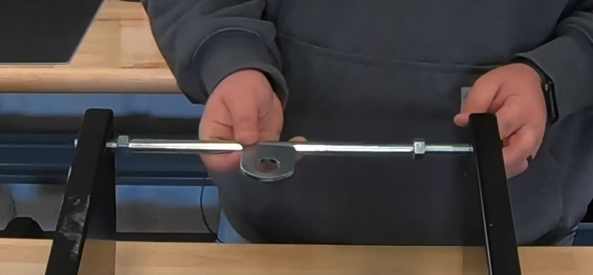
Once you’ve completed these steps, the frame bracket should be assembled and ready for mounting.
Mounting the tank
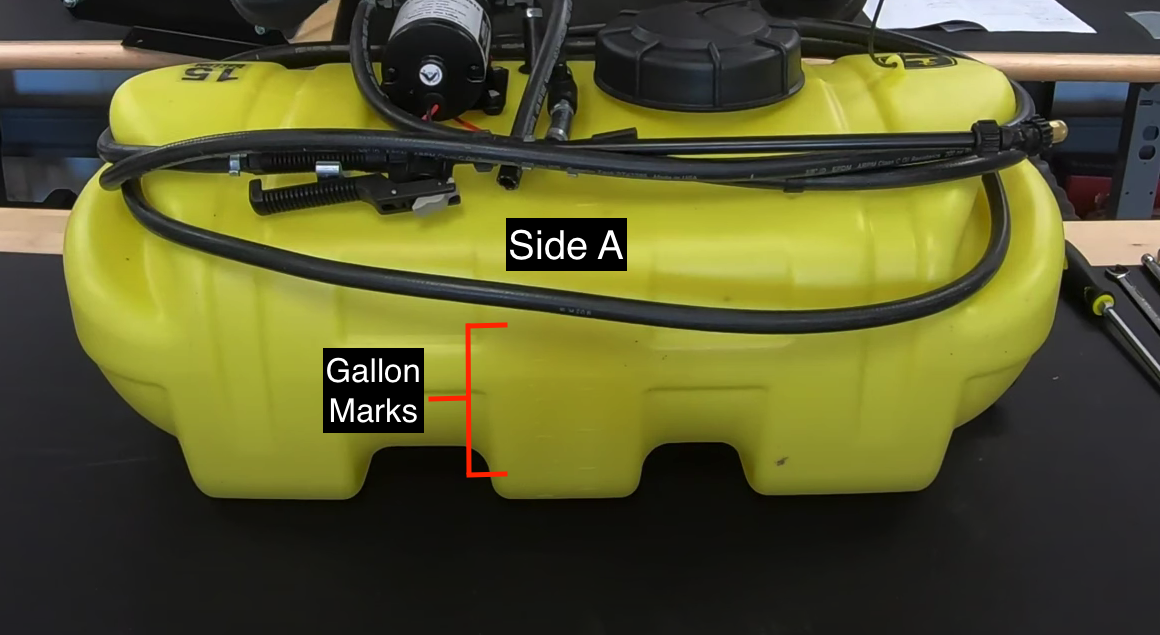
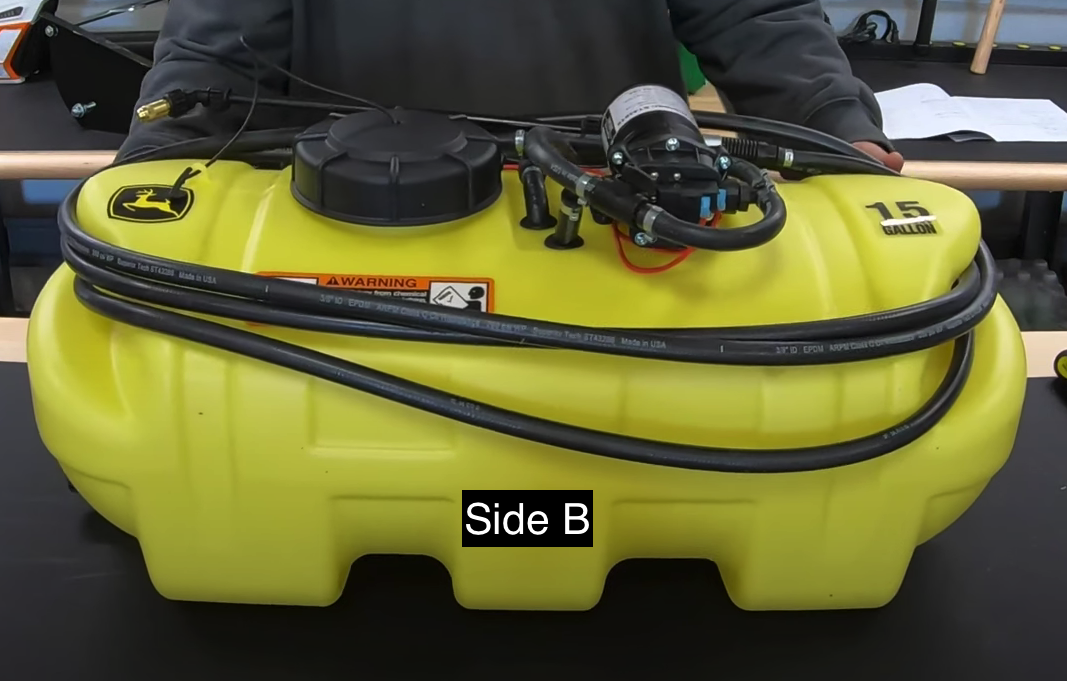
Notice that the two sides of your sprayer are different. Side A has marks that indicate measurement in gallons on the liquid inside the tank. This side should always be facing towards the operator station once mounted so they can clearly see the measurement while spraying. Side B is the rear of the tank and should be facing the back of the mower when mounted. This is where the boom will be installed.
To mount the frame bracket onto the tank, flip the tank over to reveal the four pre-drilled holes on the bottom and place the bracket on top, lining the holes up with the holes on the frame pieces. Place a flat washer over each hole and insert a hex head bolt. Twist the bolts by hand to tighten and then further secure them using the half-inch socket and ratchet. Avoid overtightening to prevent cracking of the tank plastic.

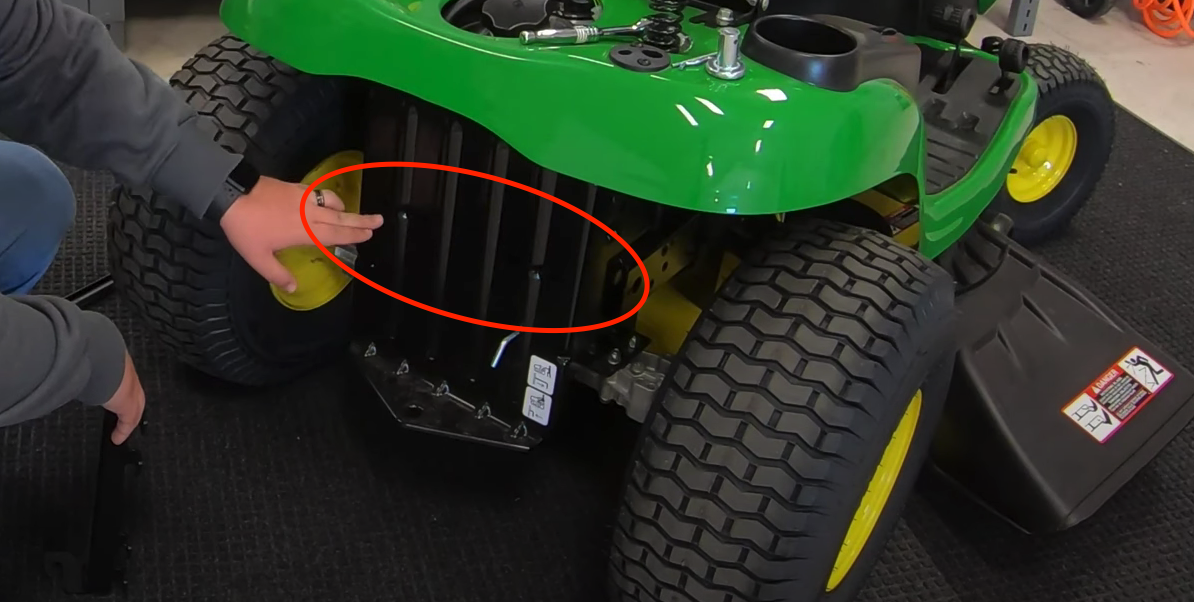
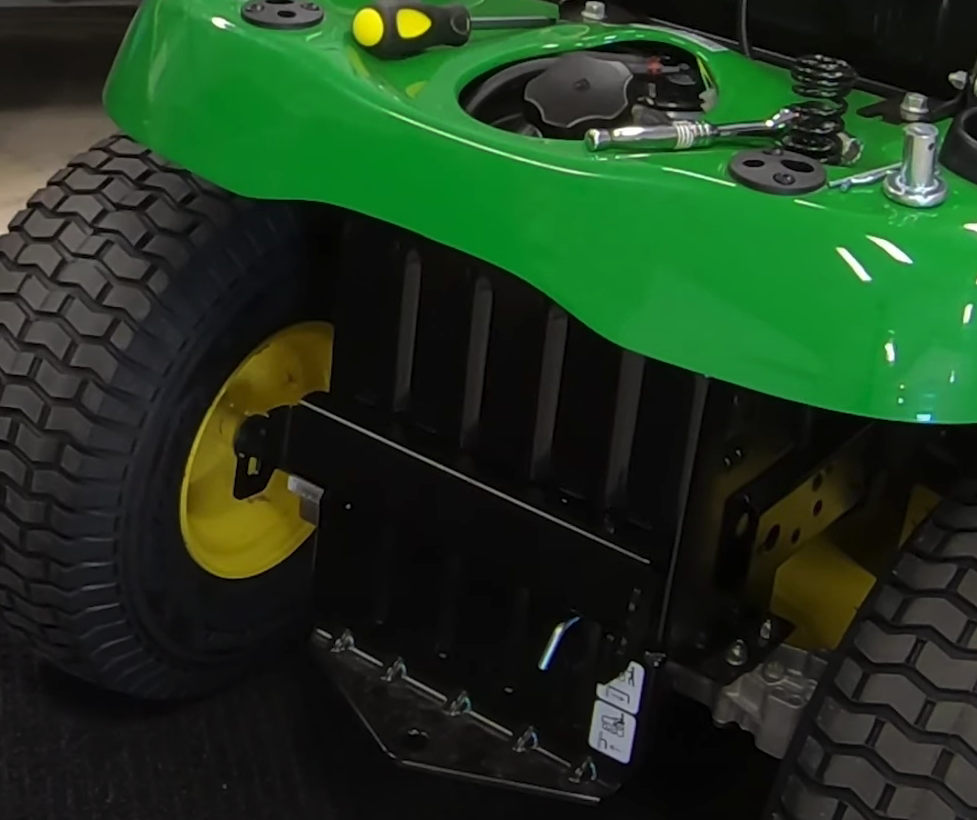
Now that the bracket is mounted, you are ready to install the tank onto the mower. The first step is to insert one of the rear mounting brackets into the four predrilled mounting holes on the back frame of the mower, shown here. Once inserted, adjust your grip and allow the rear bracket to fall slightly and settle into place. This will be held in place by the weight of the tank once mounted.

Next, lift the tank so the frame bracket is facing outwards and hook the top bar onto the rear mounting bracket. Once hooked, guide the tank down as it falls into place. Now insert the hitch pin into the mounting hole we mentioned earlier on the top bar of the frame bracket. Once done, you can secure the hitch by placing the cotter pin through the underside of the hitch pin. This will prevent the sprayer from jostling while riding.
The tank should now be securely mounted to your mower.
Mounting the boom
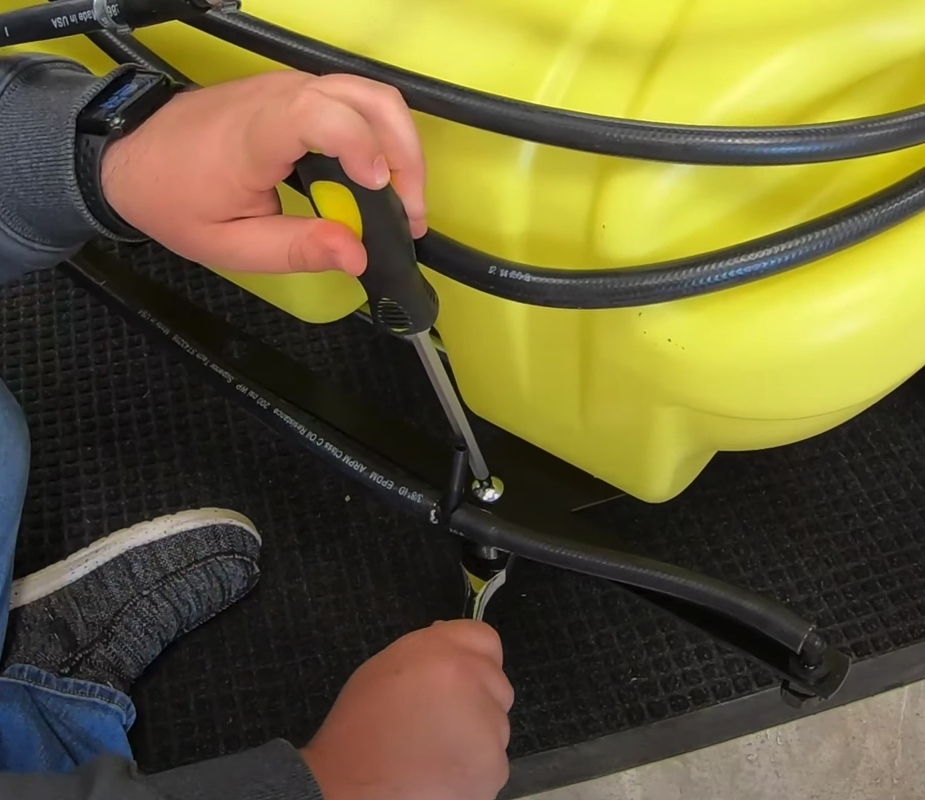
Place the boom onto the tank, lining the two holes up with the mounting spots on the frame, like shown here. Secure the boom by inserting a Phillips head screw through the holes and placing a flange nut on the bottom of each screw. Tighten the nuts using a ratchet and screwdriver.
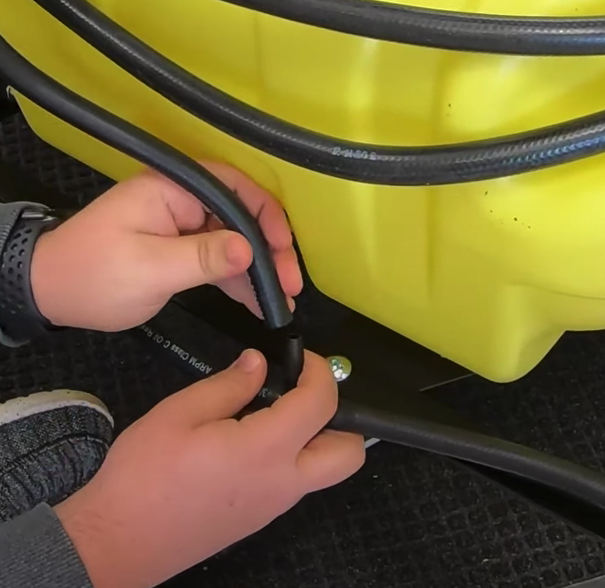
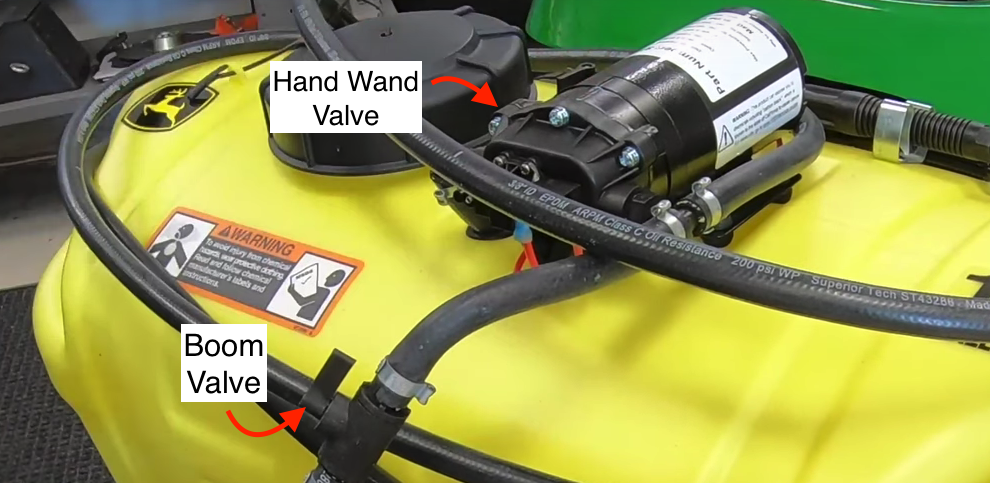
Once the boom is secured, connect the hose hanging down the rear of the tank to the barb located on the top right of the boom.
Tip for operating your boom: you have the option to turn the boom and hand wand on and off using the valves shown here. This is beneficial if you would rather use one spray method over the other.
Installing the harnesses
You have two wiring harnesses to install and connect: the switch harness and the battery harness.
To install the switch harness, find the plug attached to the pump on the tank and connect it to the shorter wire. Then string the longer wire up either side of the mower, which side is dependent upon preference. This will be connected to the battery harness, so place it near the battery.
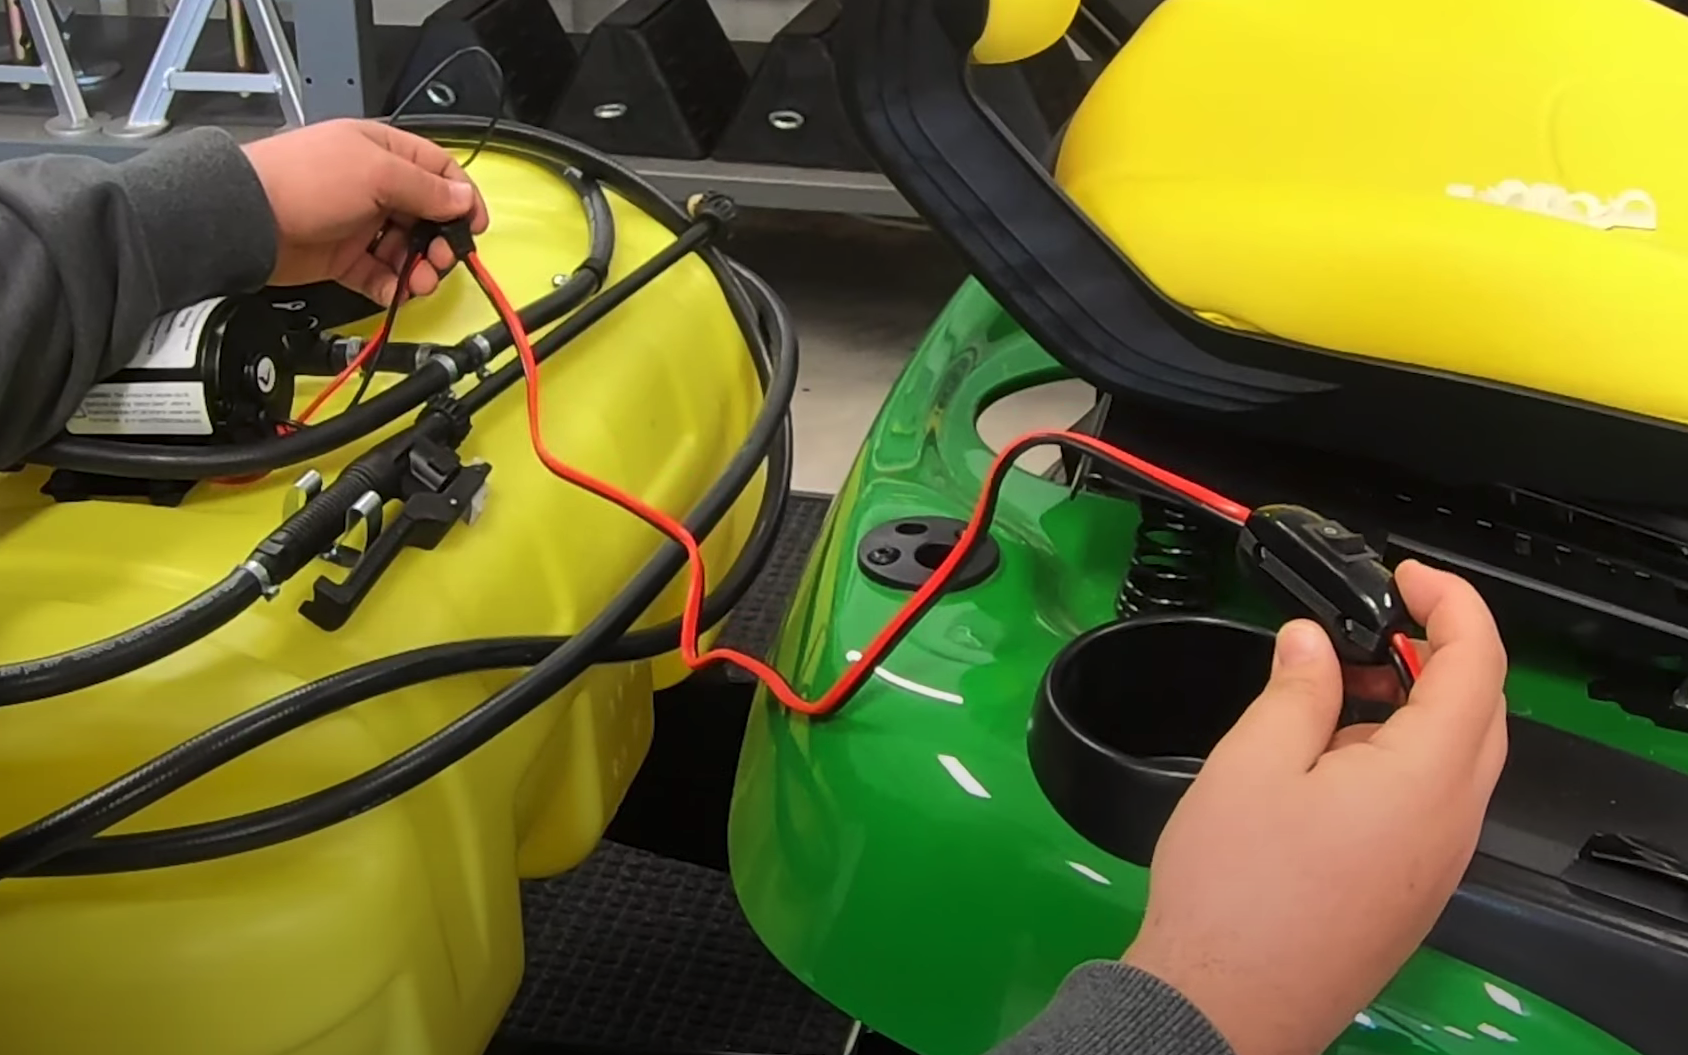
Before connecting the battery harness to your mower battery, remove the bolts and the battery terminal covers. Here you see the wires and battery terminals are color coordinated; red means positive and black means negative. Always remove the negative cover and connect the black wire eyelet there first before moving onto the red wire and the positive battery terminal cover. This will ensure a safe connection process.

Once the battery harness is connected, run the harness out and connect to the switch harness. You can then secure the wires to the side of the mower using the five wire clips that came with your kit. These will stick to the side of your mower and hold the wires in place.
---
And that’s it! You’ve now successfully assembled and mounted your John Deere 15-gal Rear Mount Sprayer.
If you have questions about any of the steps outlined above, or are just more of a visual learner, head over and subscribe to our YouTube channel to watch our step-by-step video (also attached below)! Be sure to leave a comment with your questions to receive a personal reply from Brent himself, our resident YouTube John Deere expert.
Follow along on Instagram too!