How to Install a John Deere Z365R Home Maintenance Kit
By: Katie McKinley
It’s important to care for your equipment properly, and here at 247Parts.com, we’ve got just the tools for the job! Treat your John Deere mowers like family with our Home Maintenance Kits.
Today, we will specifically be telling you about the John Deere Z365R Home Maintenance Kit. Keep reading to learn more on what comes with the kit and how to use it.
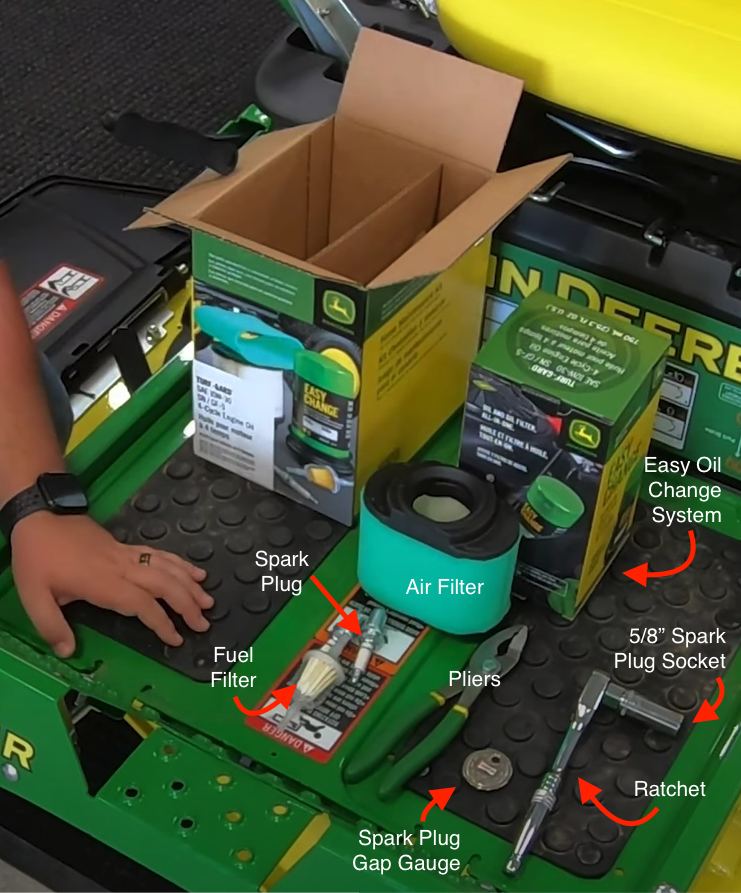
What you will find inside this kit:
- Easy Change Oil System
- Air filter
- 2 spark plugs
- Fuel filter
What tools you will need:
- Pliers
- Ratchet
- 5/8-inch spark plug socket
- Spark plug gap gauge
Steps of Use
For a more detailed overview of the steps outlined in this blog, check out our video below!
Changing the air filter
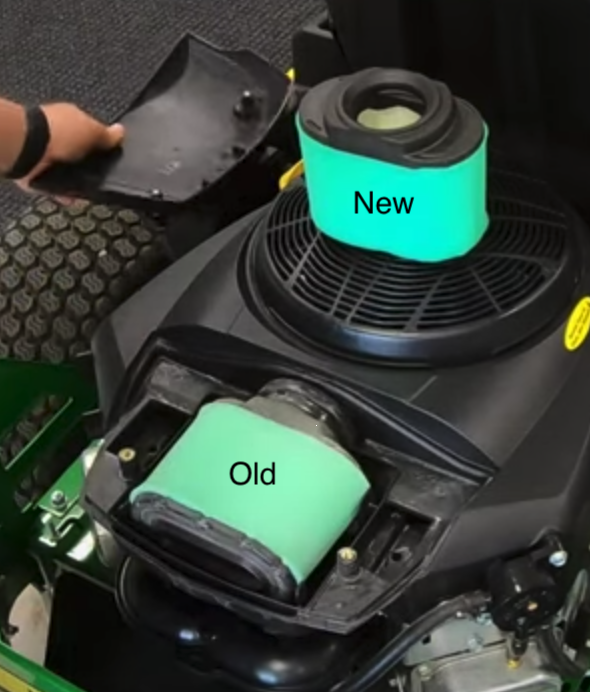
To change the air filter in your mower, start by loosening the two hand-twist bolts on the housing cover and lifting to remove. Locate and remove the old filter and simply insert the new one in its place. Replace the housing cover and secure using the hand screws.
Changing the fuel filter
Replacing your mowers fuel filter is a bit more complicated than the air filter.
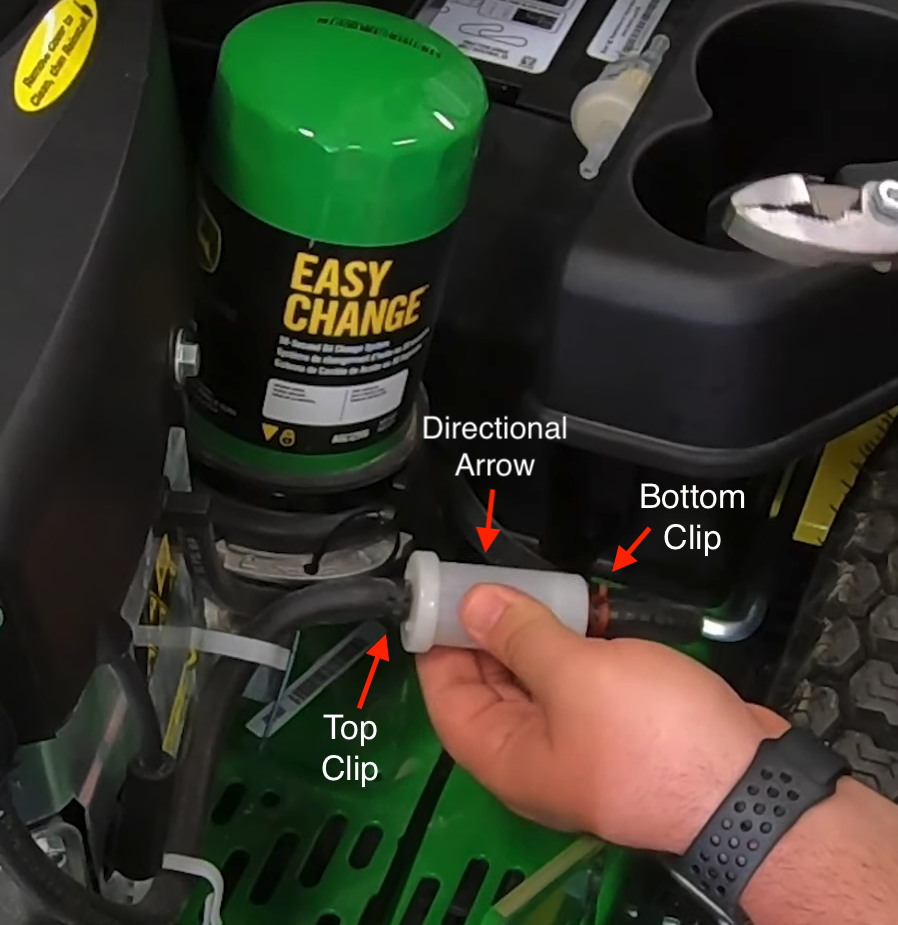
Using pliers, begin loosening the two clips found on the top (black) and bottom (red) of the filter, like shown here. Slide the clips up the hose and away from the filter paying close attention to which hose goes where.
The red clip at the bottom secures the hose that carries fuel into the filter from the tank. You will see an arrow on your filter that indicates which direction the fuel will flow. This arrow should always be pointing towards the engine.
After moving the clips, remove the hoses from the filter and install them into the new one—again making sure to pay close attention to the directional flow arrow mentioned above. Now reinstall the clips—red on bottom, black on top—to complete fuel filter install!.
Replacing the Easy Change Oil System
If you are servicing a brand-new mower like the one shown in this blog, you may find your filter zip-tied in place. This is for shipping purposes and can easily be removed before starting.
To begin install of your Easy Change Oil System, grip the top of the filter and turn it counterclockwise until unlocked, then just lift to remove and set aside.
Now pull off the cap located on the bottom of the new filter. With the cap removed, insert the filter into the side of the engine, being sure to align the small, yellow arrow with the points shown here. The arrow can be found along the side of filter.
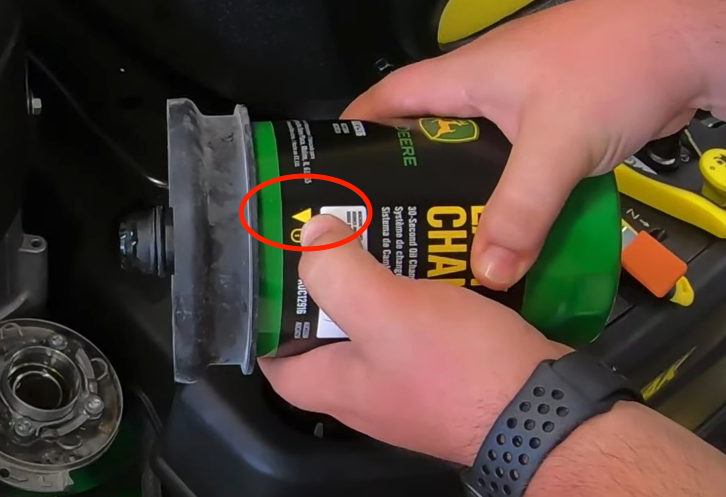

Turn the filter clockwise to lock it into place to complete your ECOS install.
Changing the spark plugs
With a V-Twin engine like the one we are working with here, you will need to replace two separate spark plugs on either side of your engine.
Prior to installing, use your gap gauge to ensure your new spark plugs are gapped correctly. Using the measurements on the gauge as a guide, insert the smallest side between the top electrode and the middle pin. Next, run the plug along the edge of the gauge until there is a bit of resistance. This resistance will tell you the gap measurement on your spark plug. For the specific engine, the measurement should read 0.030.
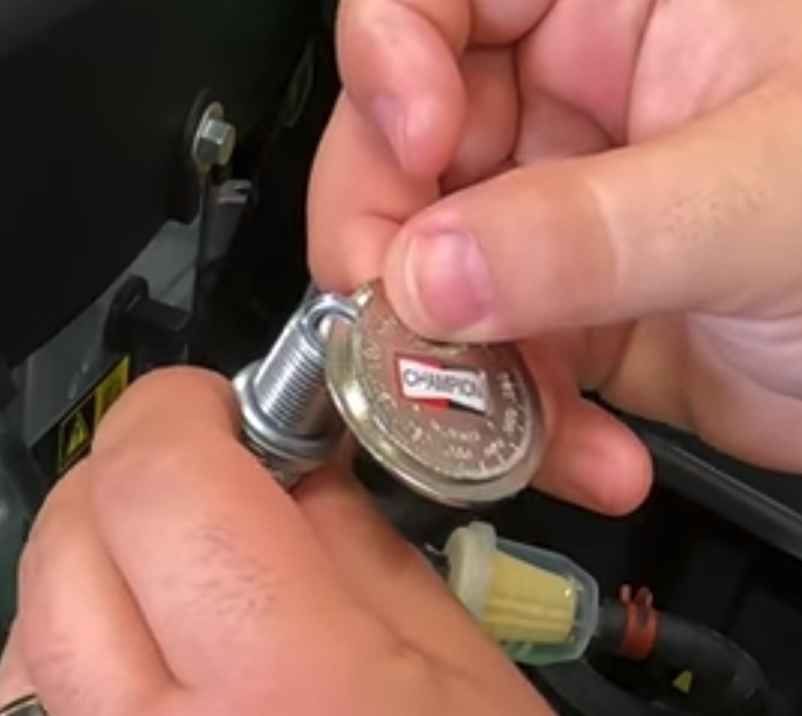
The required measurement may be different on other machines. Always read your operating manual to find out what is needed before you install a new spark plug.
Once confident your plugs are gapped correctly, lift and remove the spark plug cap and loosen the old plug using your 5/8-inch spark plug socket and ratchet, then fully remove by hand. When inserting your new spark plug, do so by hand until you feel it has made contact with the engine, then follow with the ratchet and spark plug socket to tighten—only turn the ratchet about a quarter of the way to prevent over-tightening.

After securing your new spark plug, remove the socket and ratchet and replace the cap ensuring it clicks into place. Now simply repeat these steps on the opposite side of your engine.
You have now fully completed this HMK installation and are ready to tackle your lawn!
---
If you have questions about any of the steps outlined above or are just more of a visual learner, head over and subscribe to our YouTube channel and watch our Step-by-Step video (also attached below)! Leave a comment with your questions to receive a personal reply from Brent himself, our resident YouTube John Deere expert.
Follow along on Instagram too!

